Step 1
From your Dashboard, click on a course.

Step 2
From the Navbar choose "Content"

Step 3
Click the “Action” button next to the title of the object you wish to publish
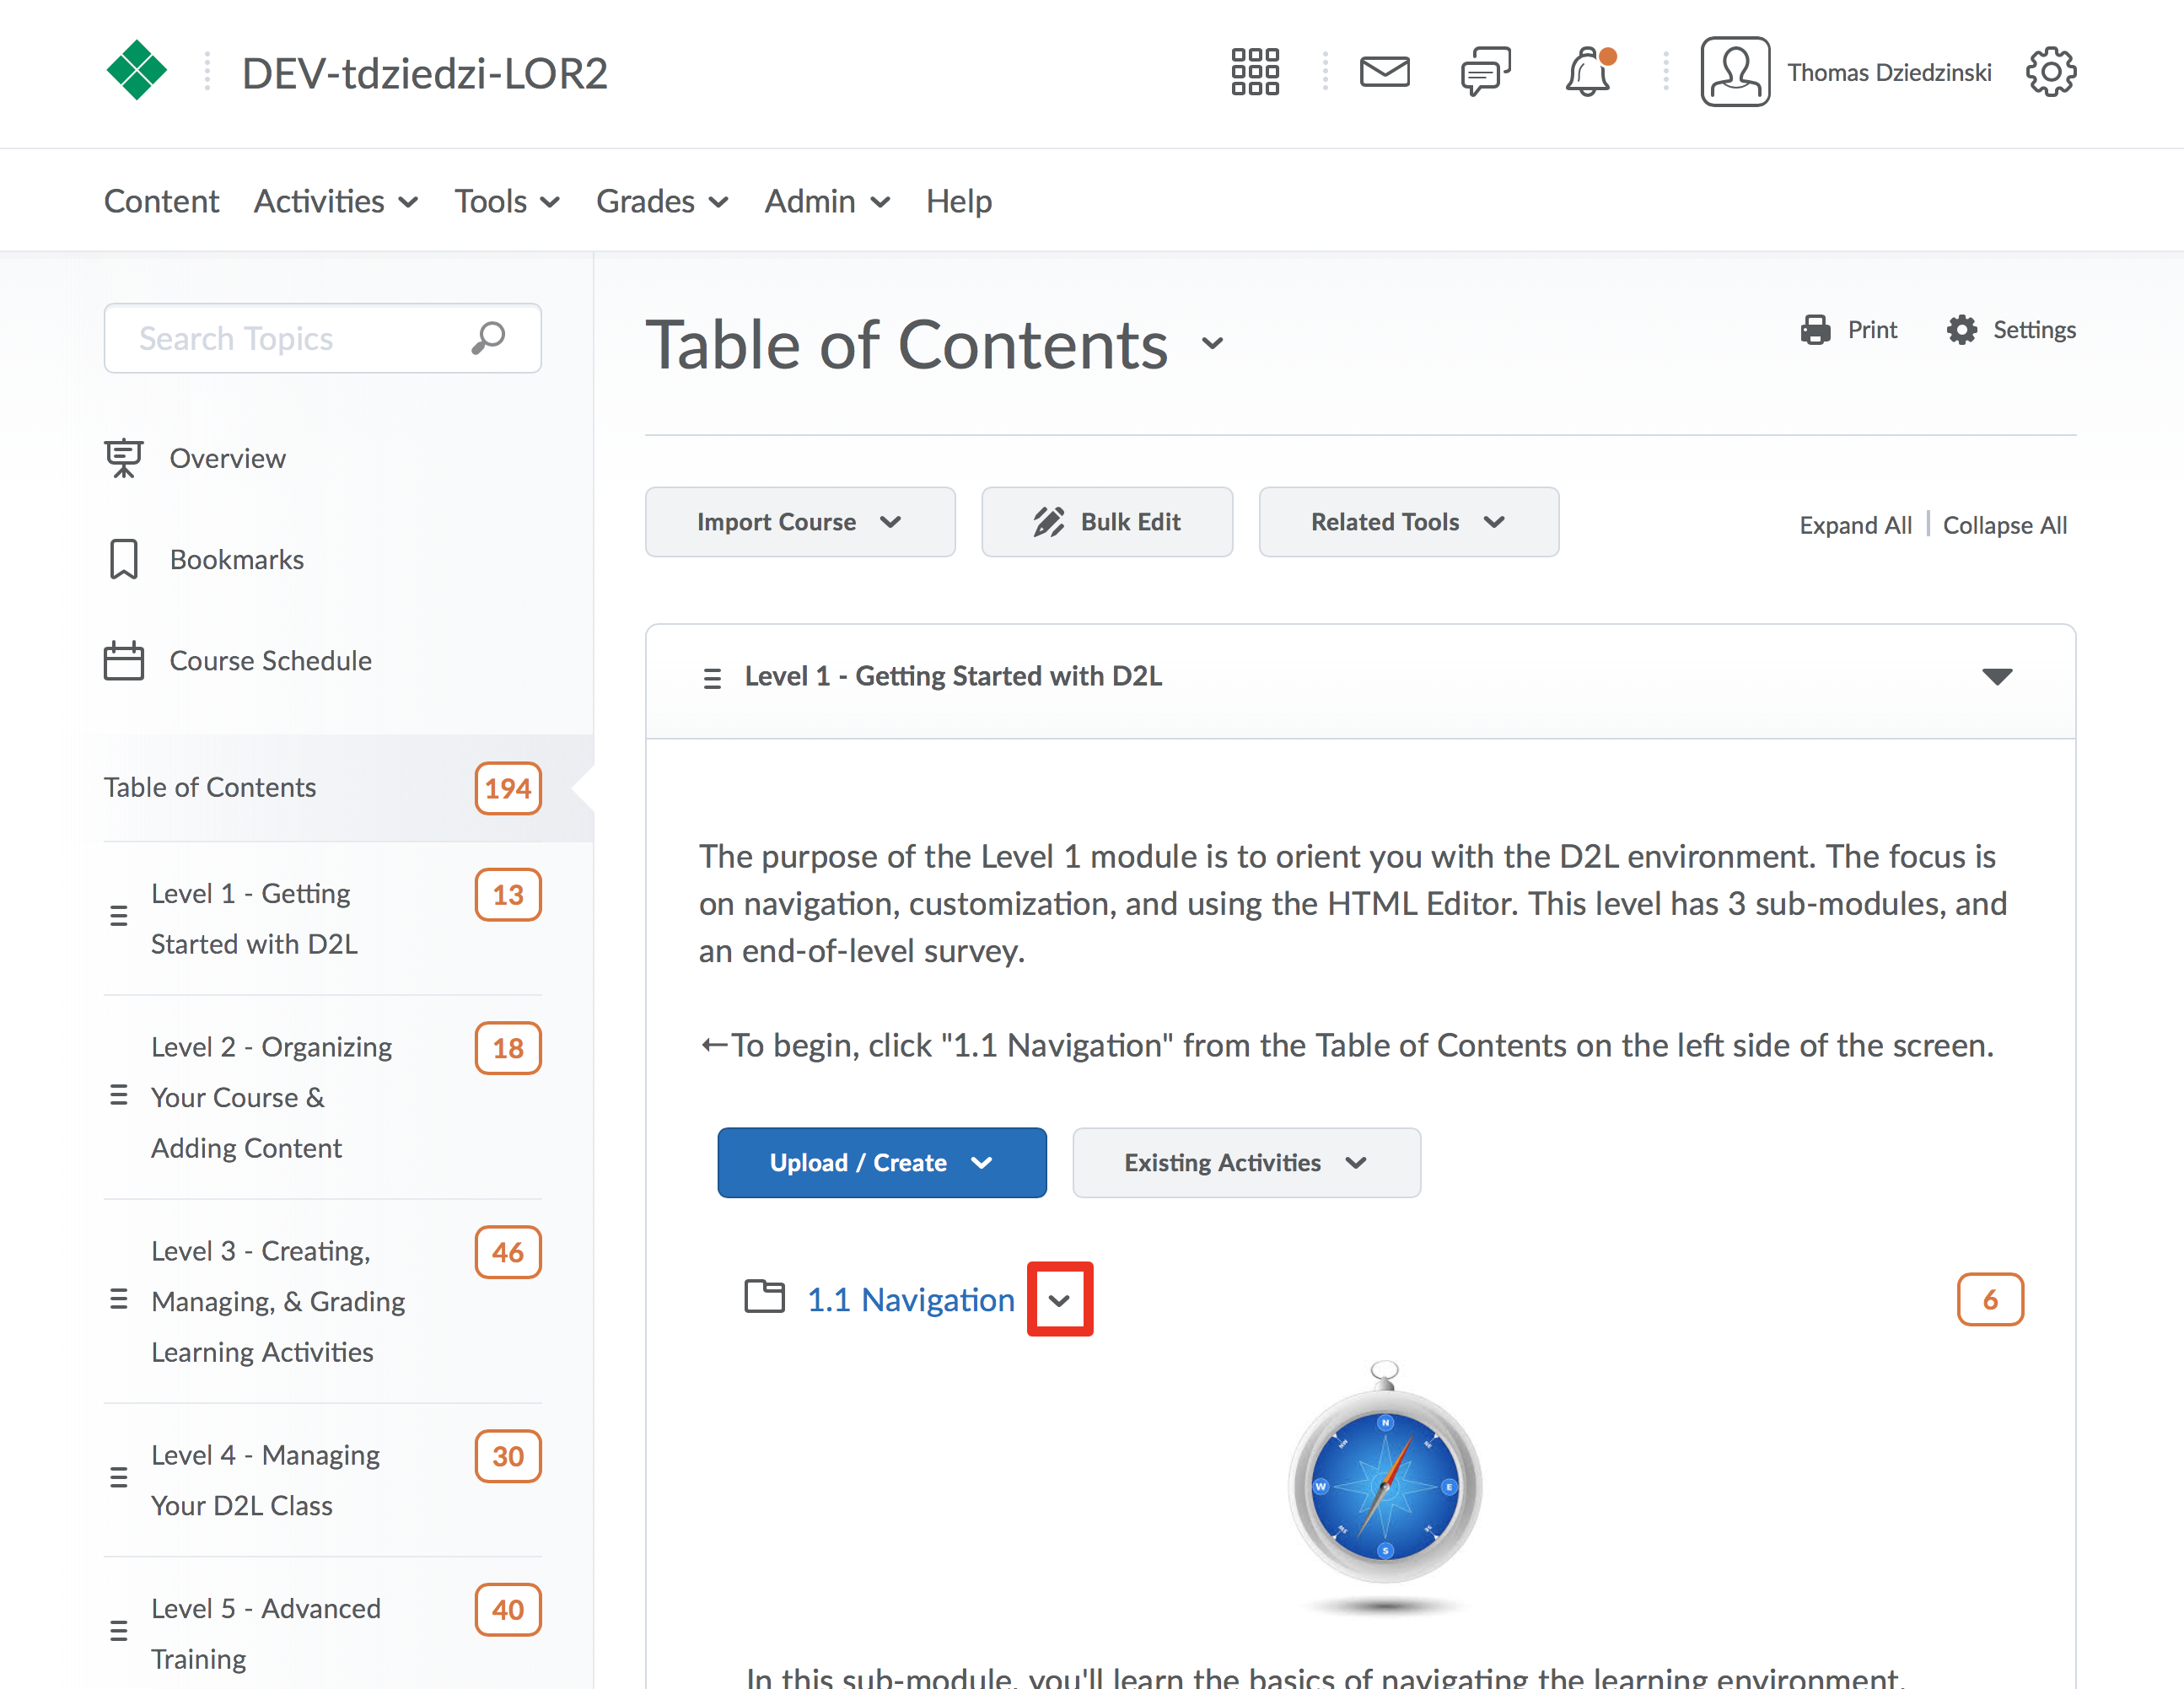
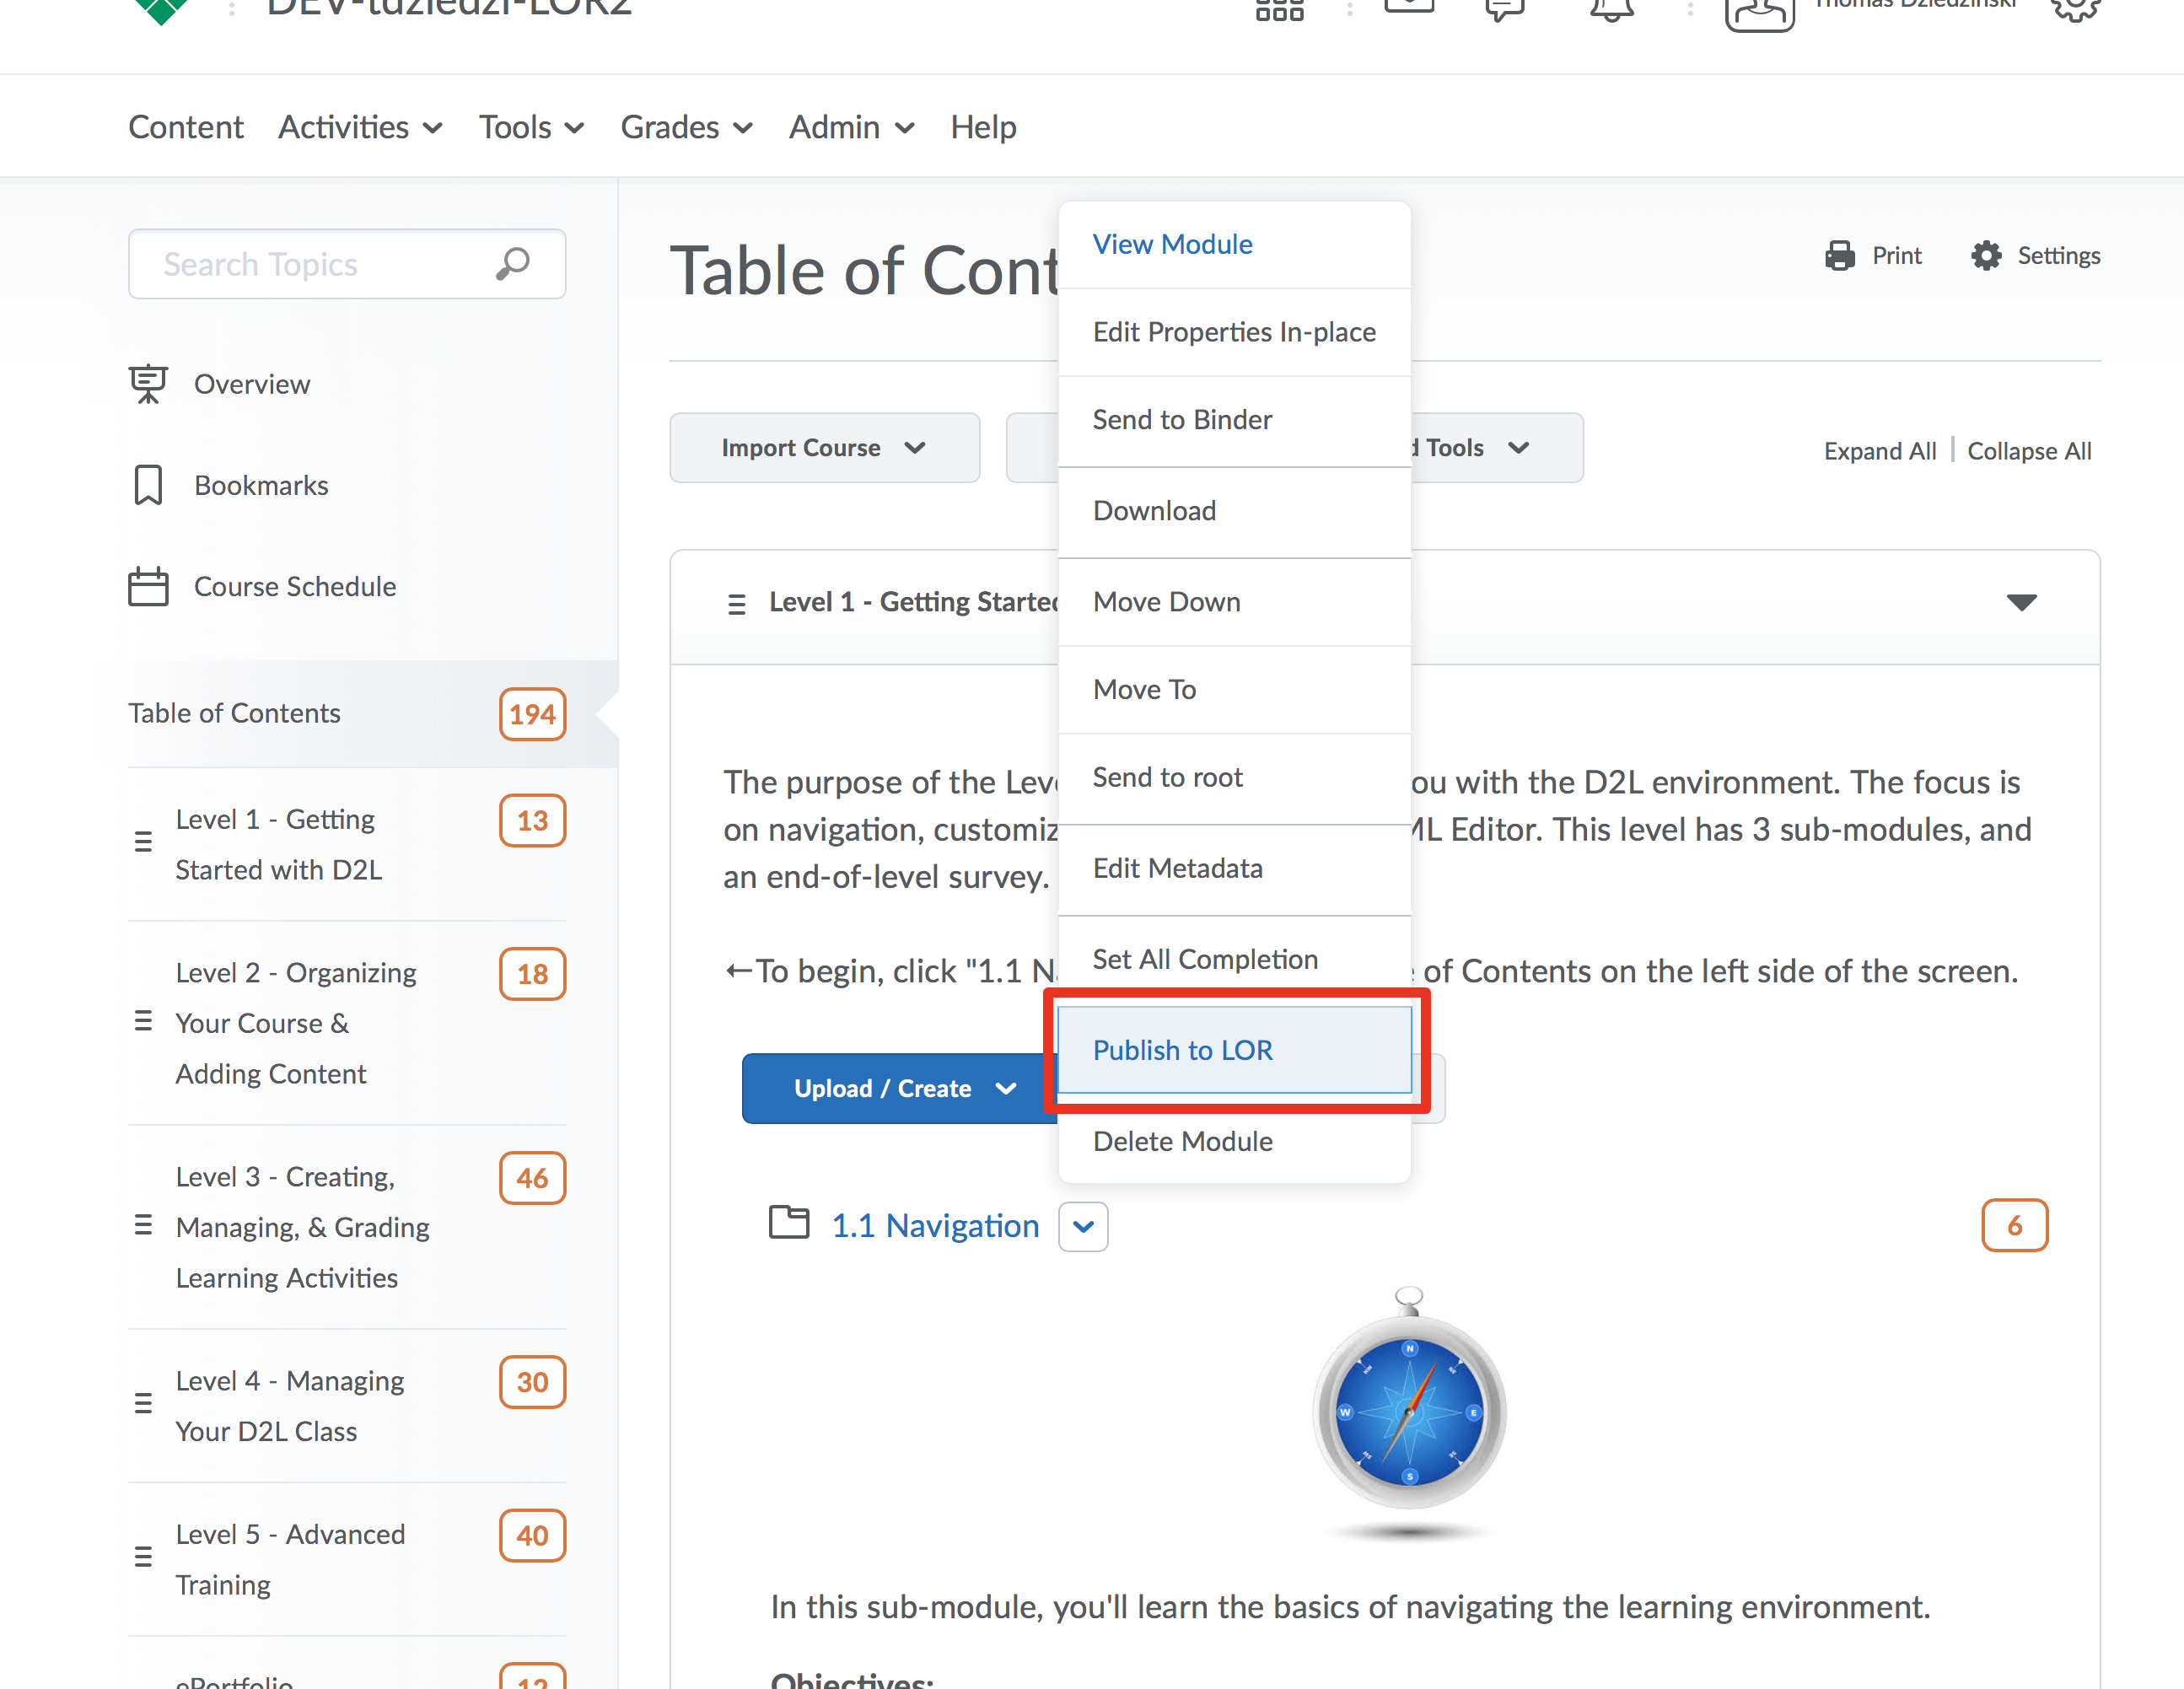
Step 4
Click “Publish to LOR”
Step 5
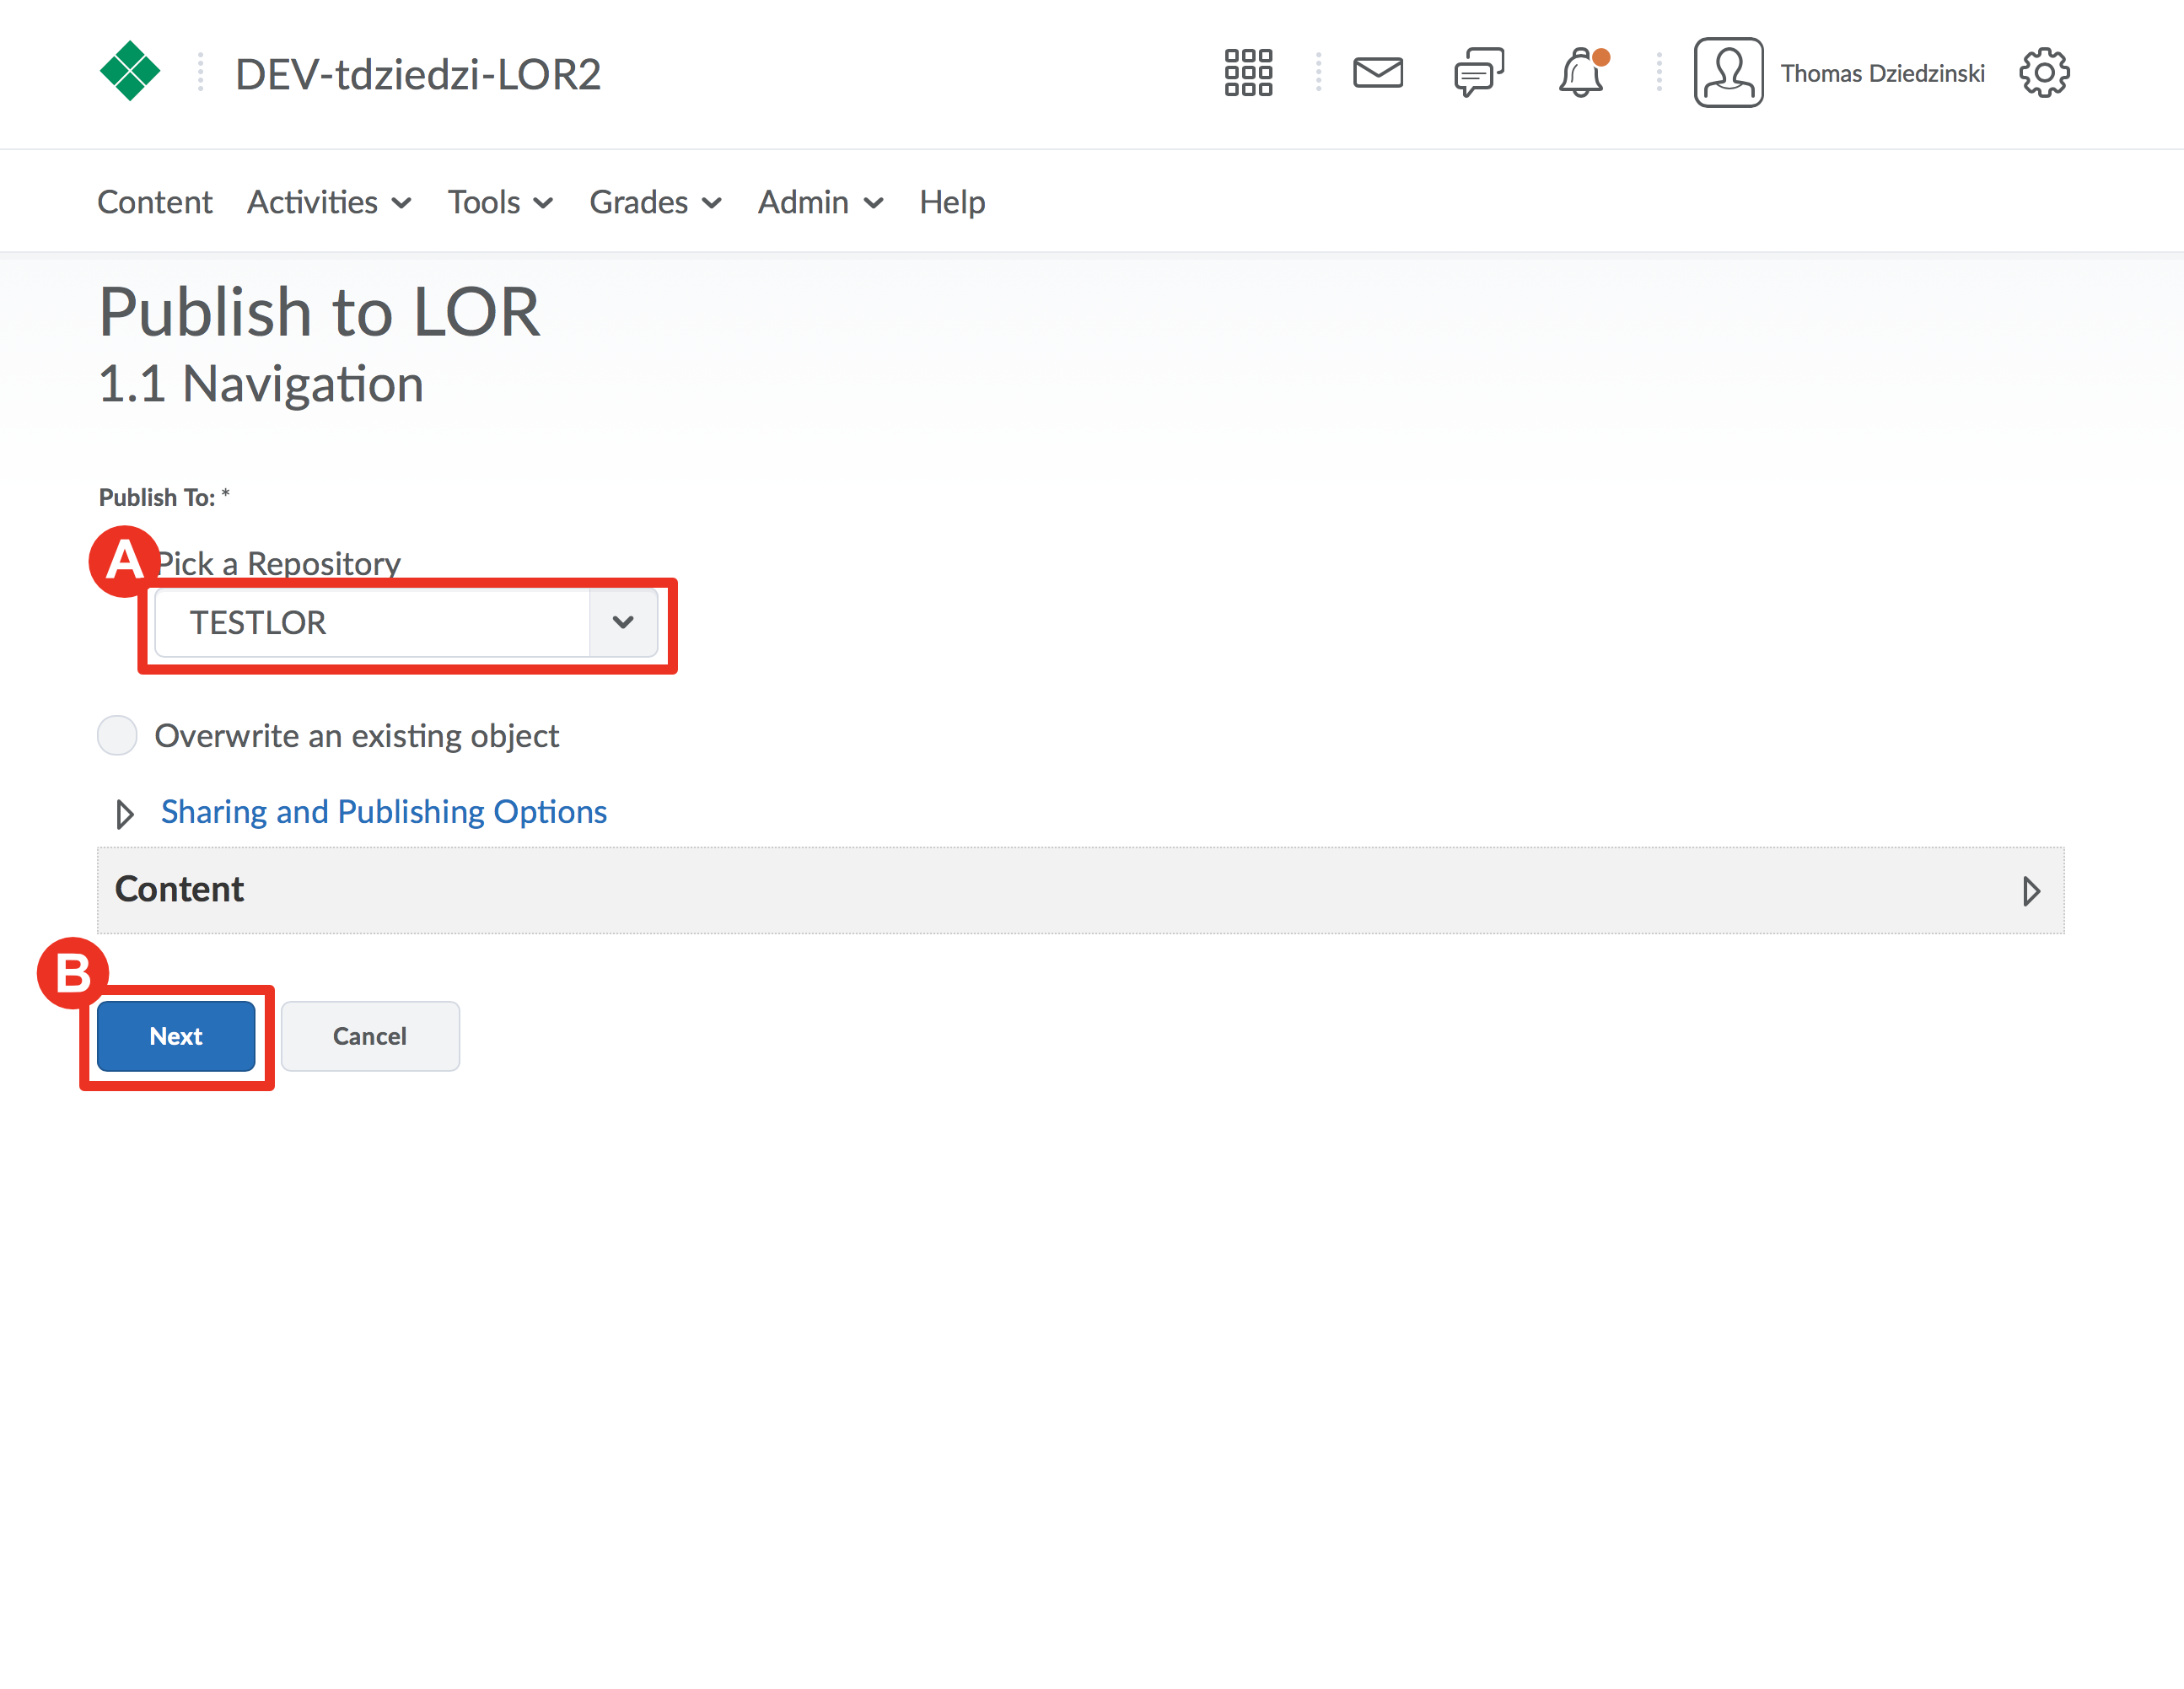
On the next page, choose between two options:
Select a repository (A)
or
Overwrite an existing object (B)
Note: Overwriting will be covered in the final part of this module. Click here to access it.
We will focus the next steps publishing a new object. Choose Pick a Repository

Step 6
Choose the desired repository from the drop down menu (A)
Then click "Next" (B)
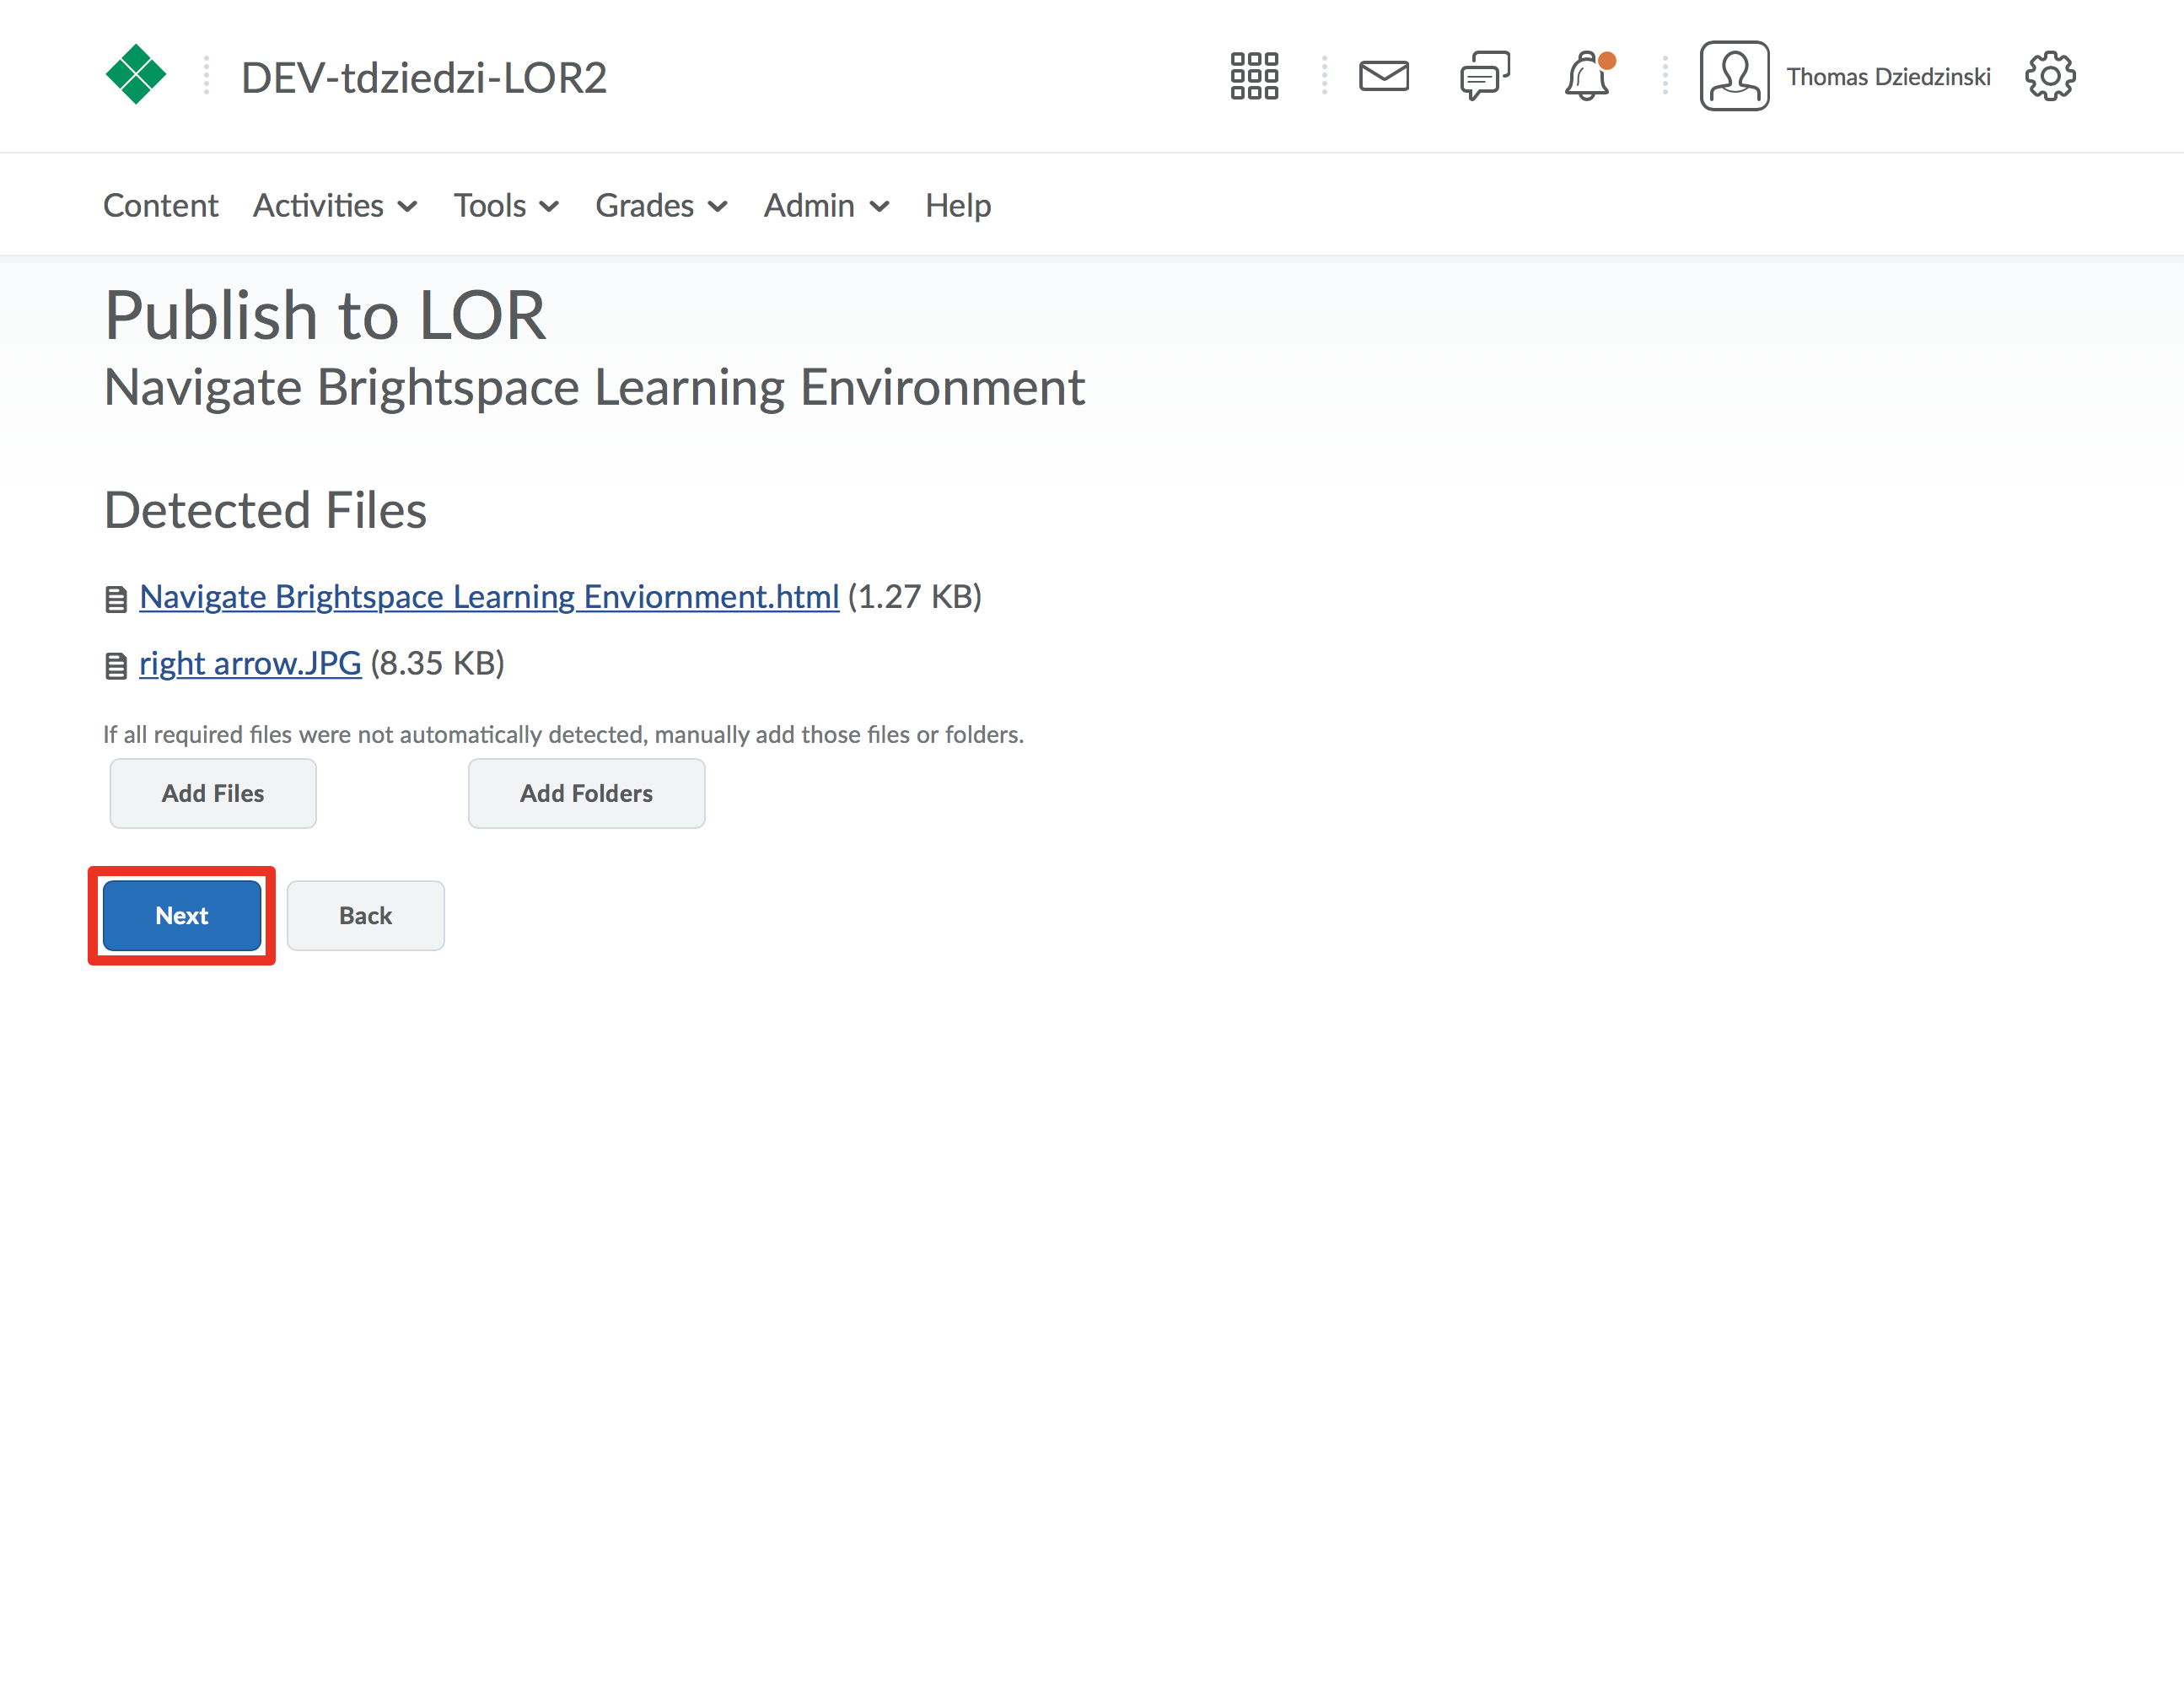
Step 7
If you are publishing objects that have files included in them, make sure they are detected and listed on this screen. If they are not, you can add files and folders from your course.
Click "Next"
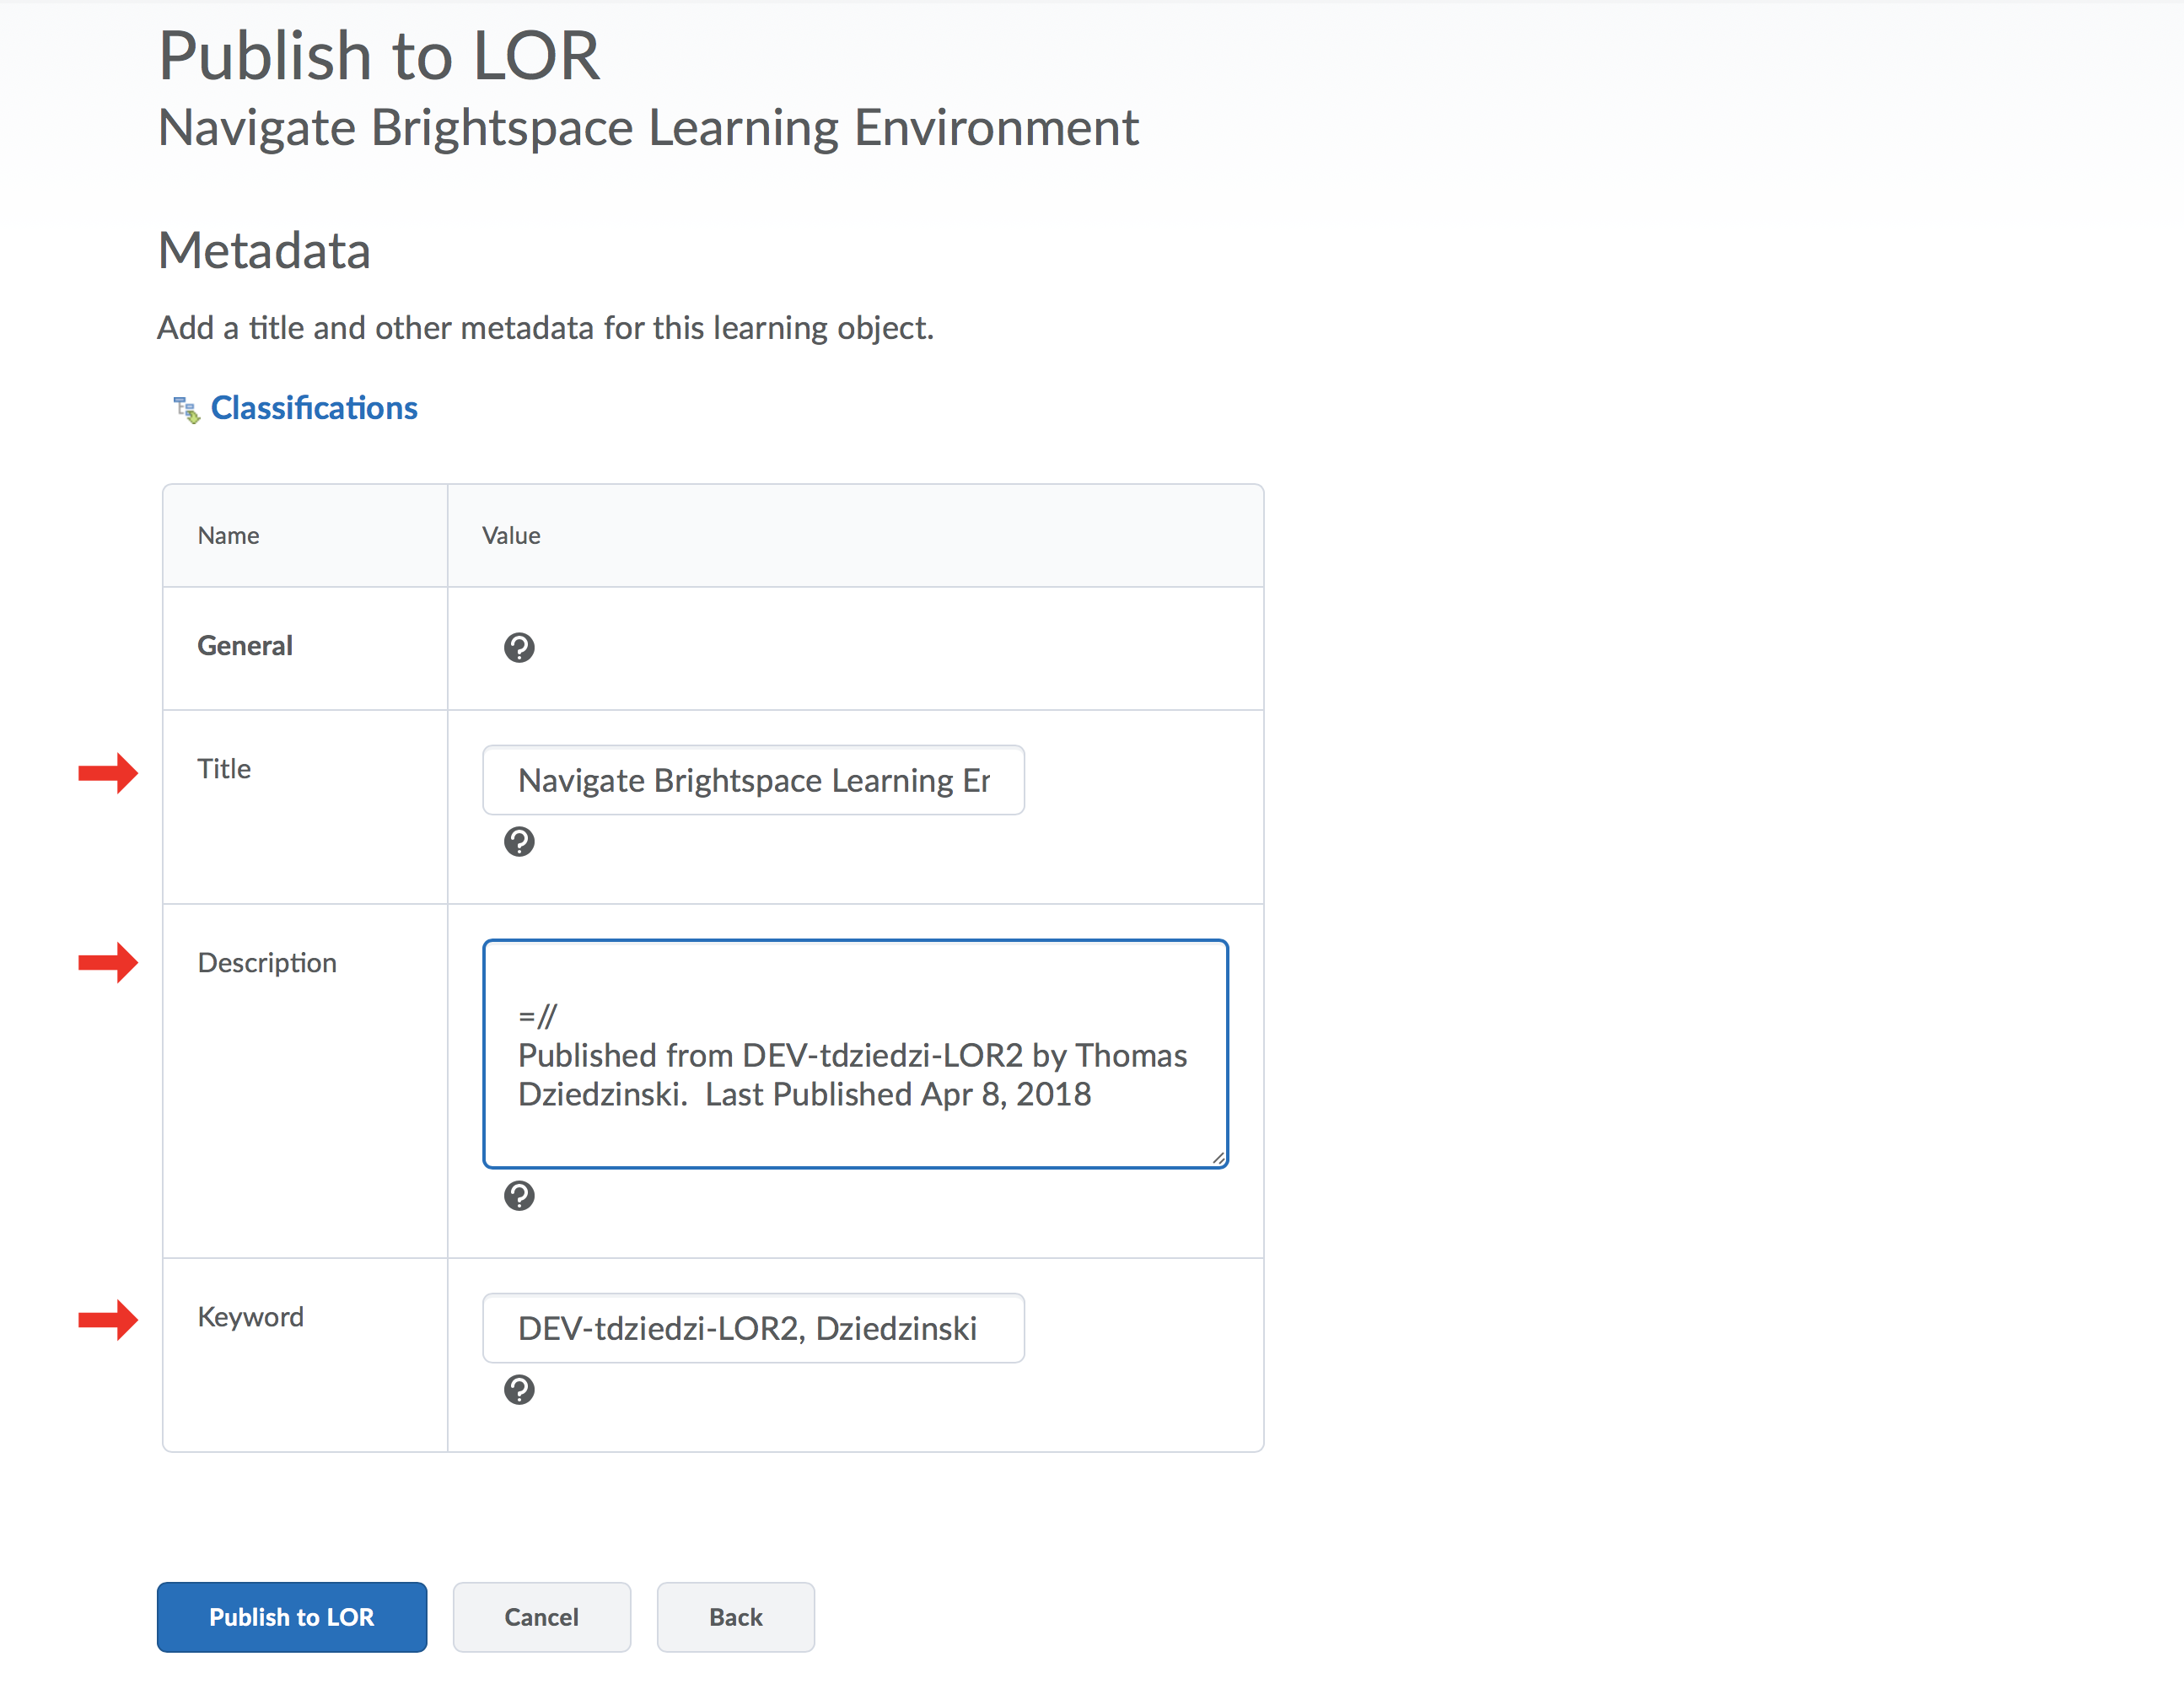
Step 8
Fill out the required metadata fields including: title, description, and keywords that describe and categorize your learning object.
Click here to access the module on Metadata.
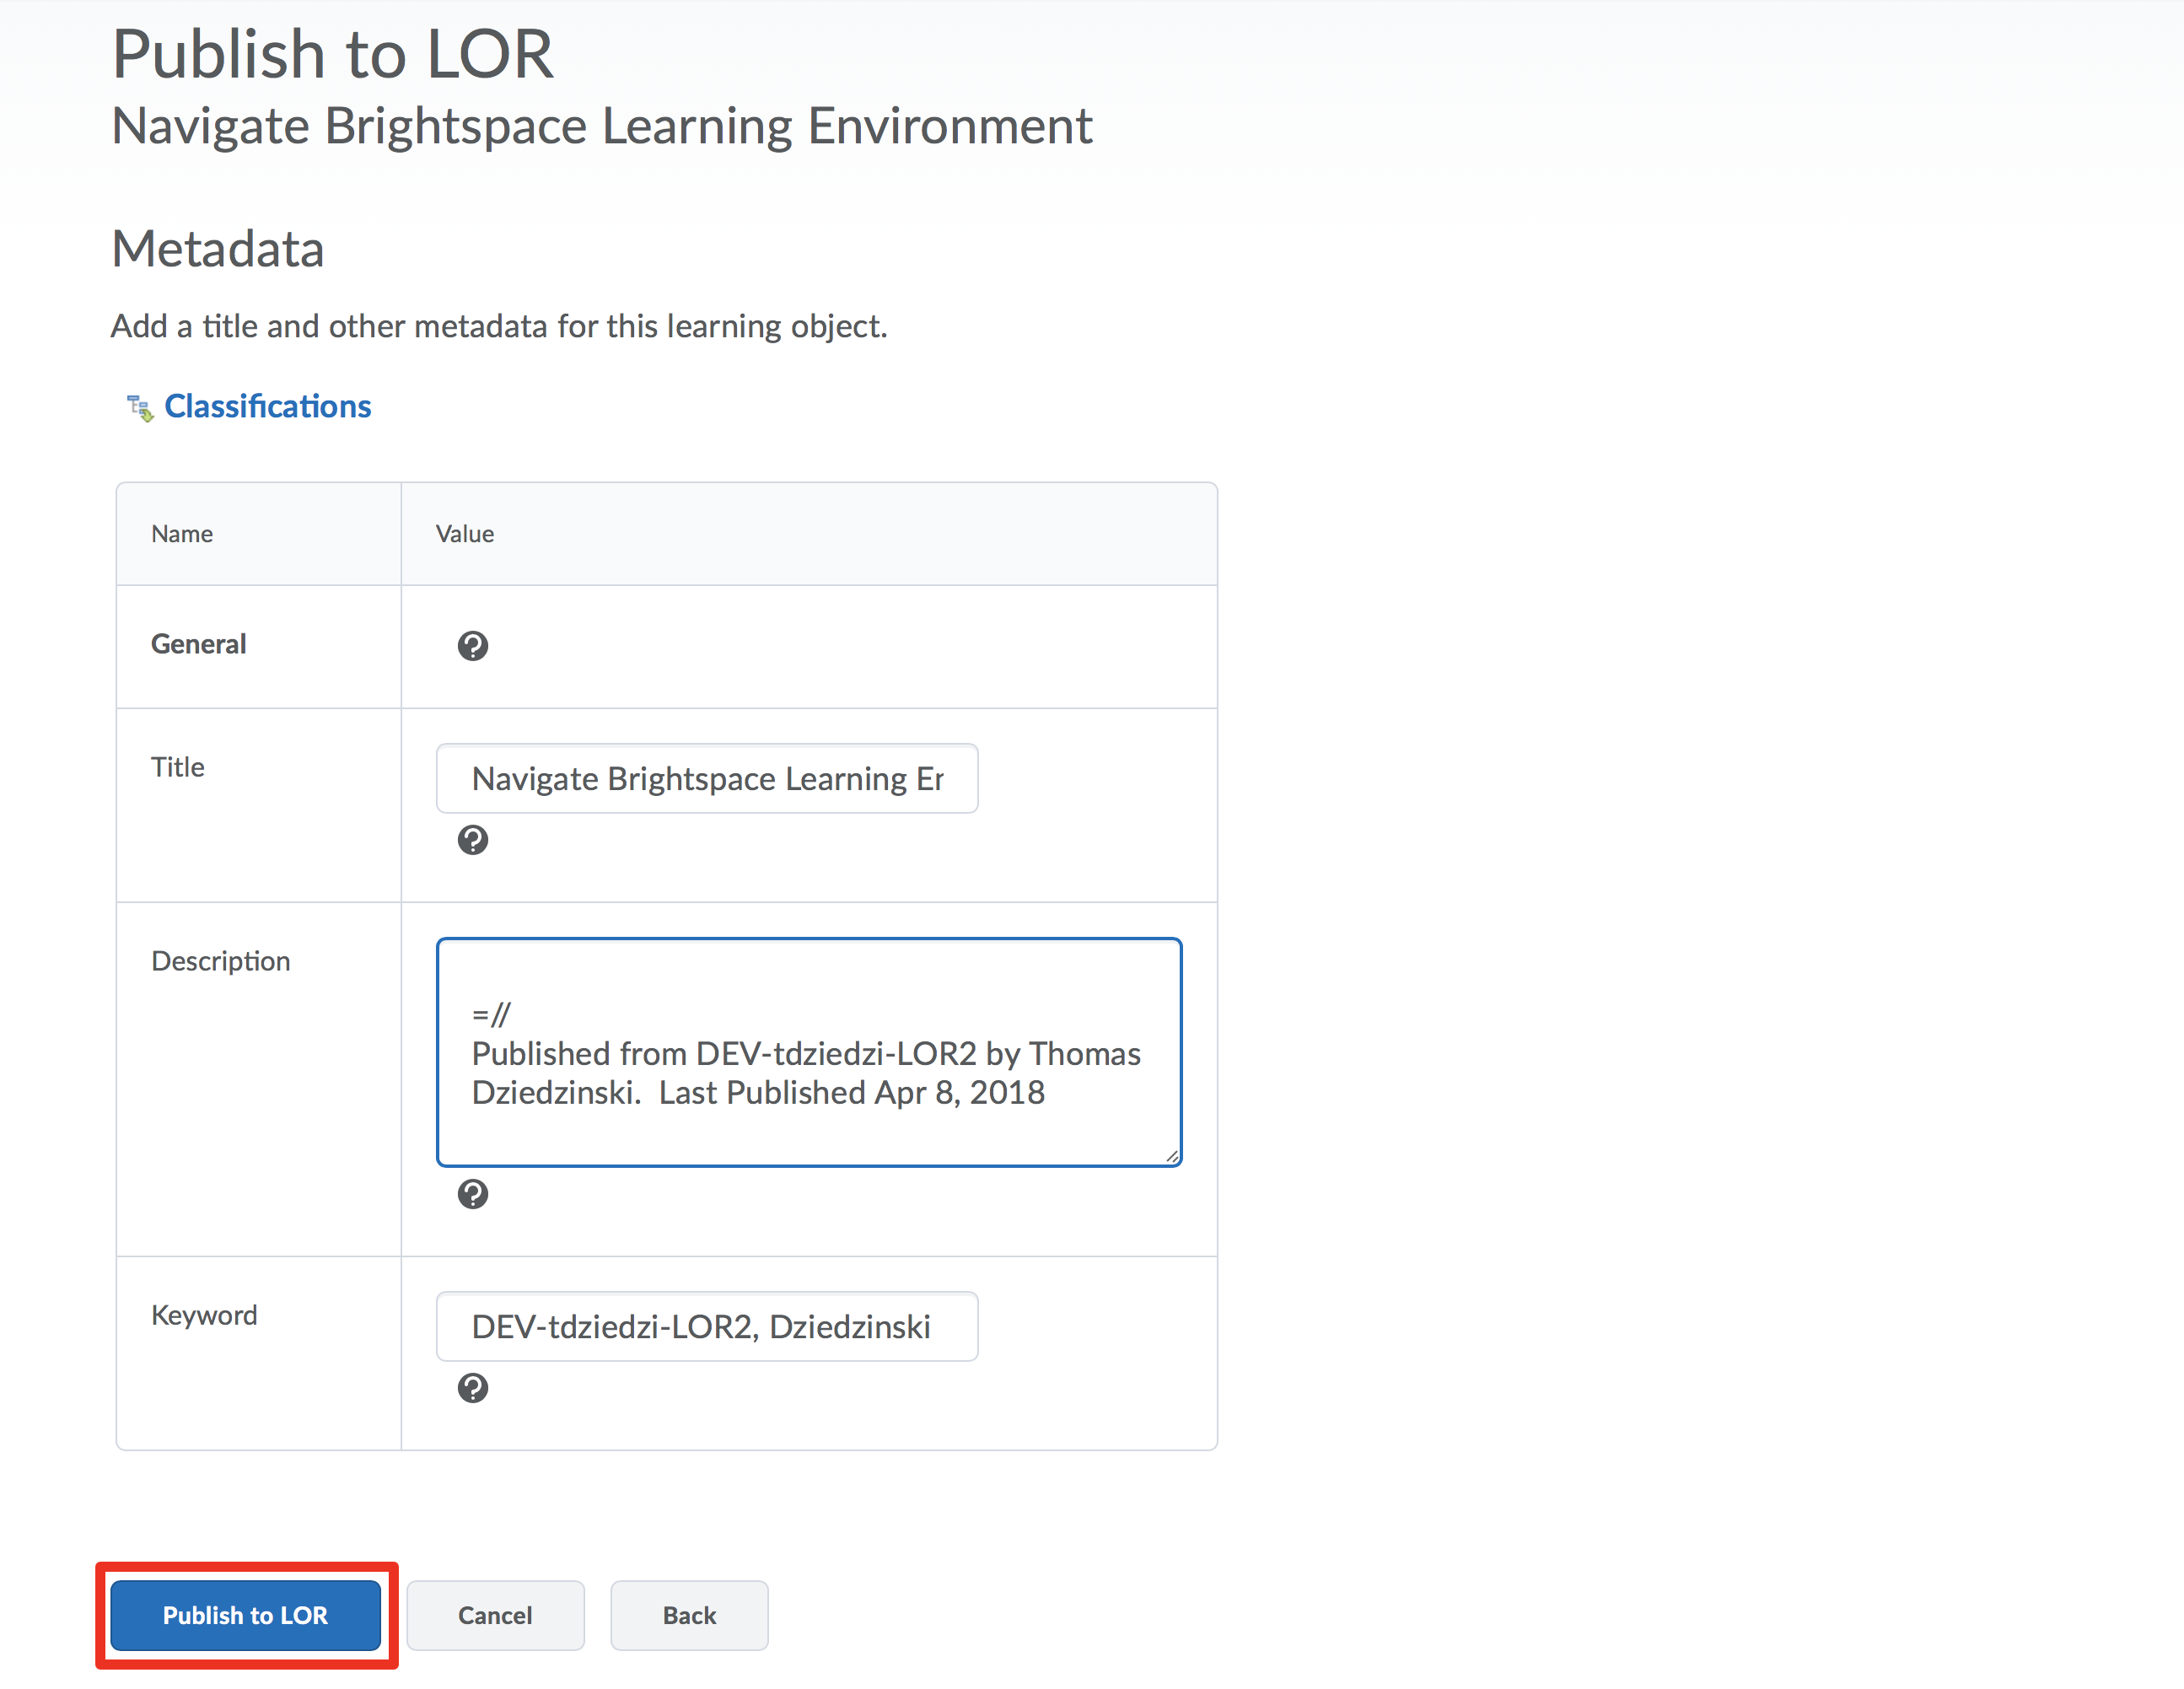
Step 9
Click “Publish to LOR”
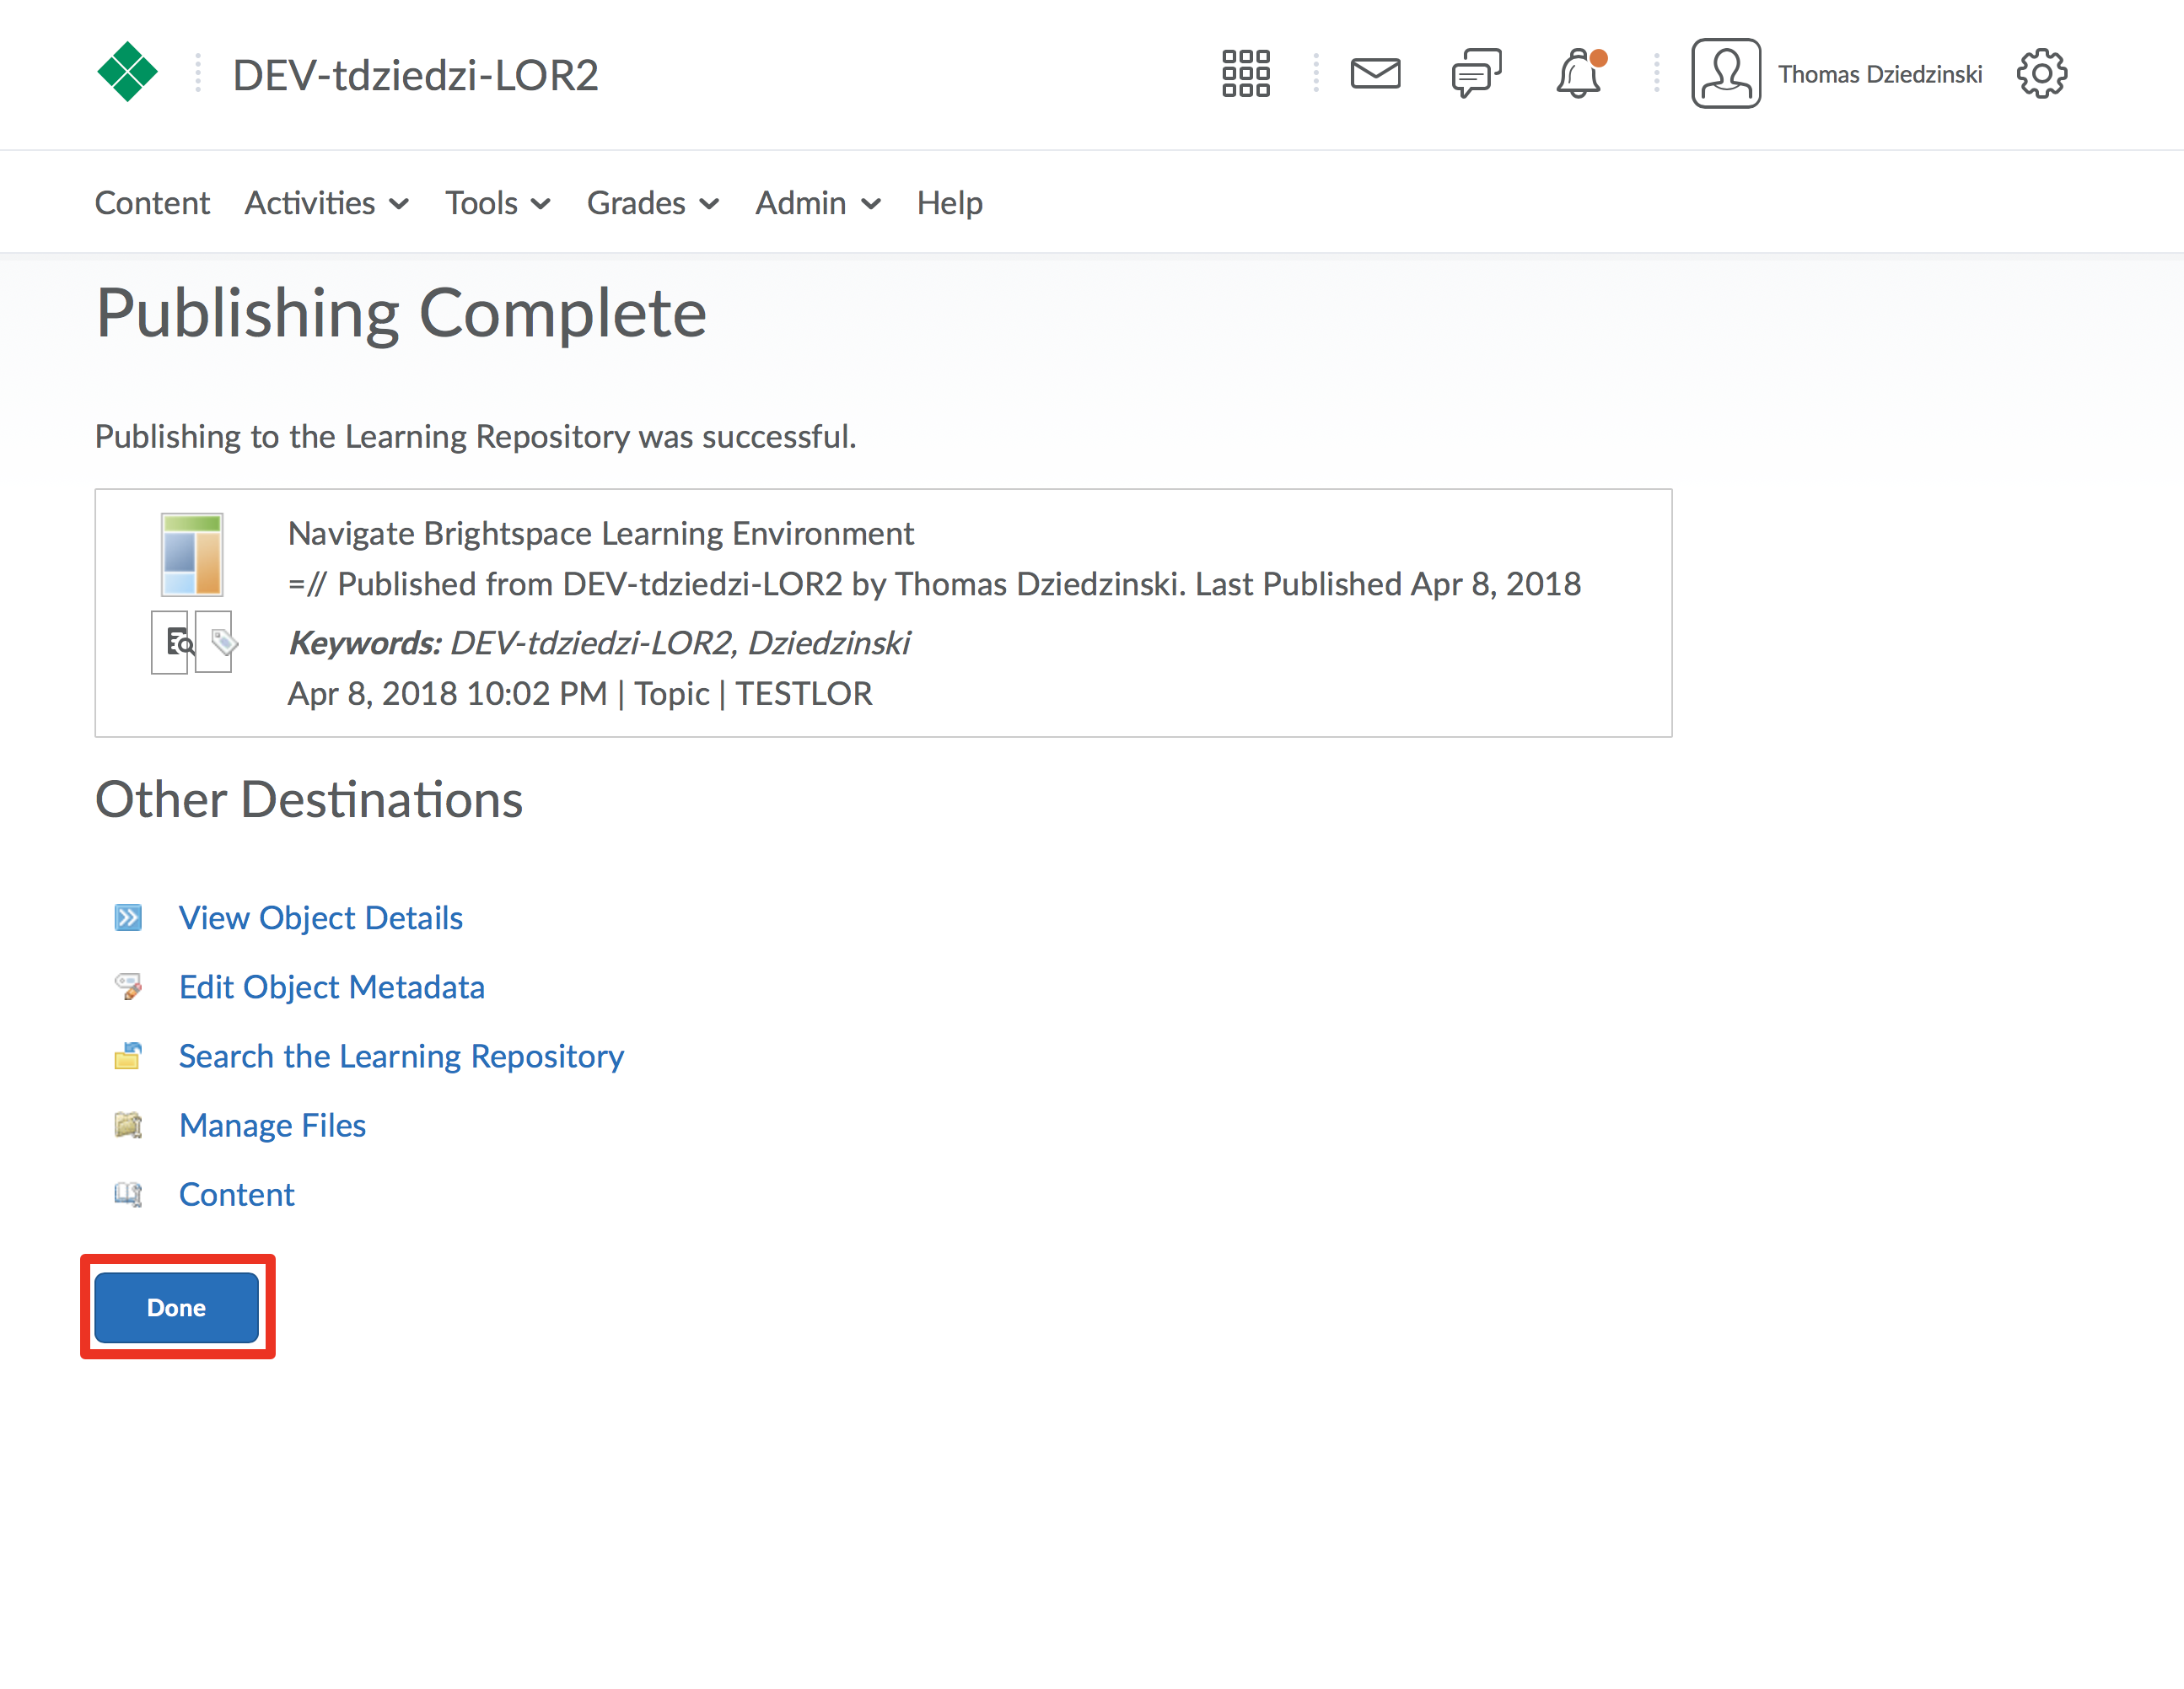
Step 10
After the processing completes, click “Done” to return to your course.