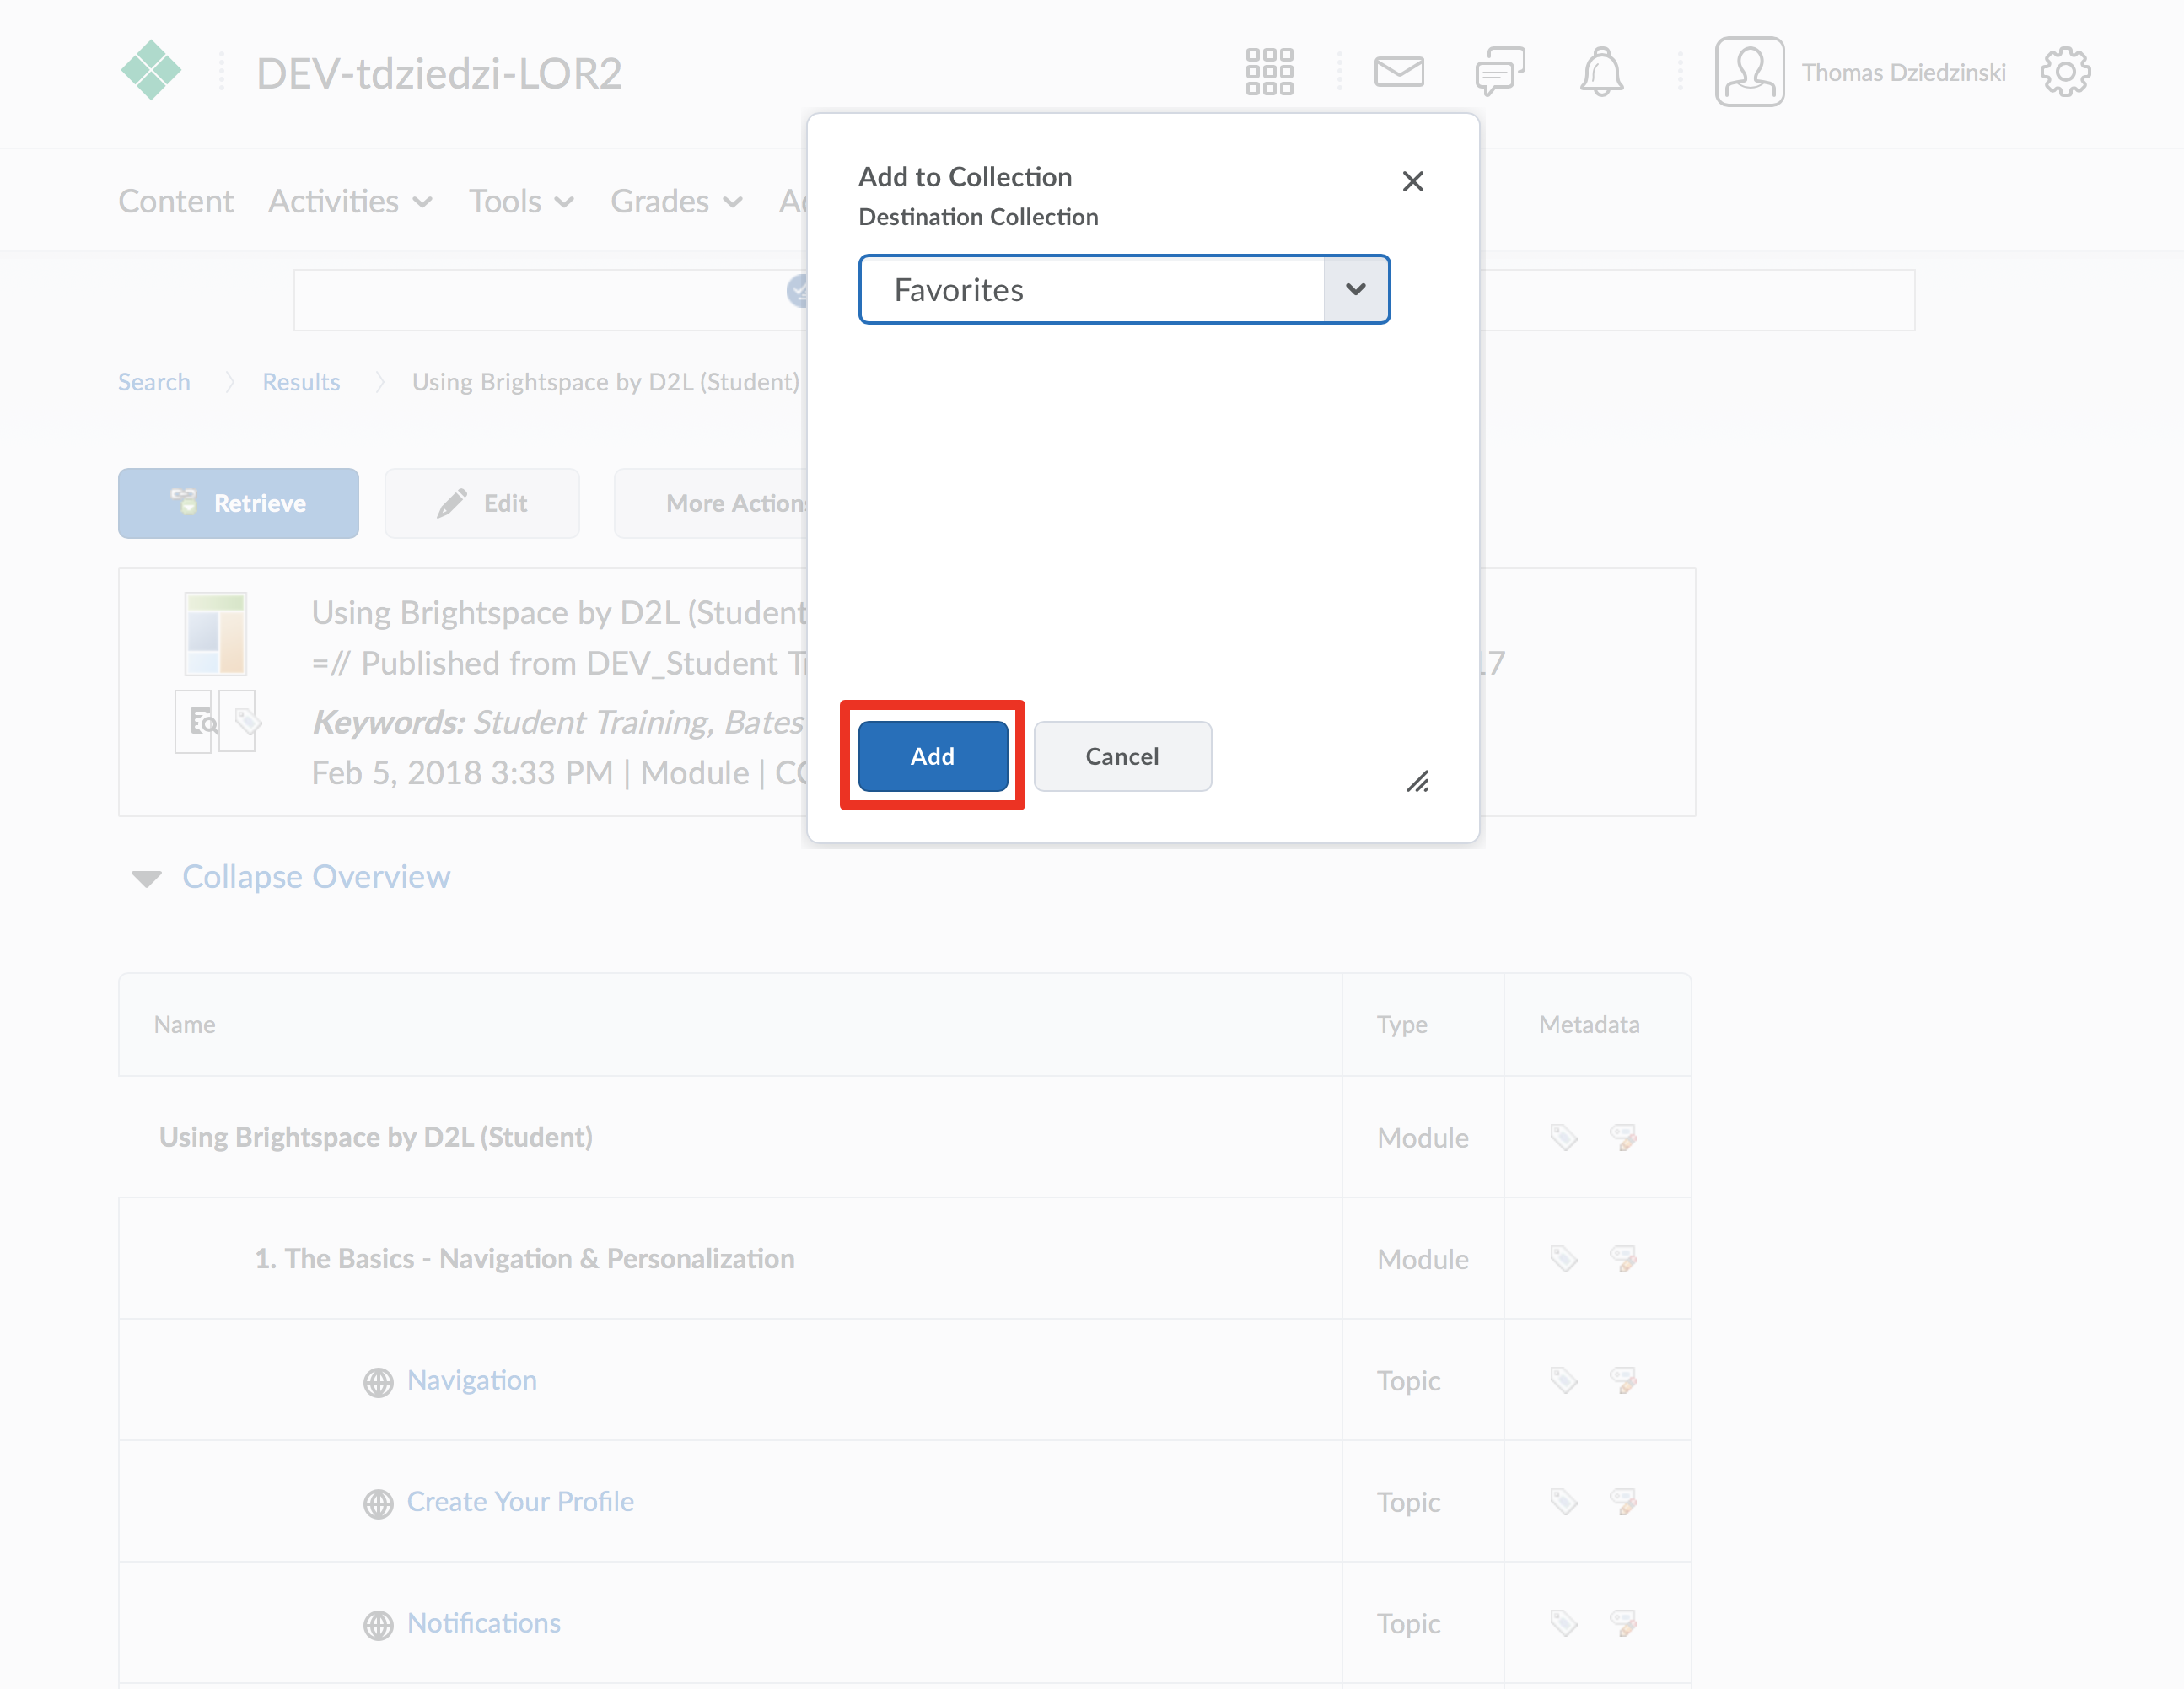
If you find learning objects (either your own or your colleagues) you can make it easier to locate or organize them by placing them into collections. A collection is a group of learning objects that you create and manage. Learning objects can only be in one collection at a time.. At the top of this page you will find a narrated video demonstrating these steps. Below you will find the steps written with accompanying screenshots.


Step 1

Perform a search (A) or browse for a learning object. Once located, click on the object to view it (B).
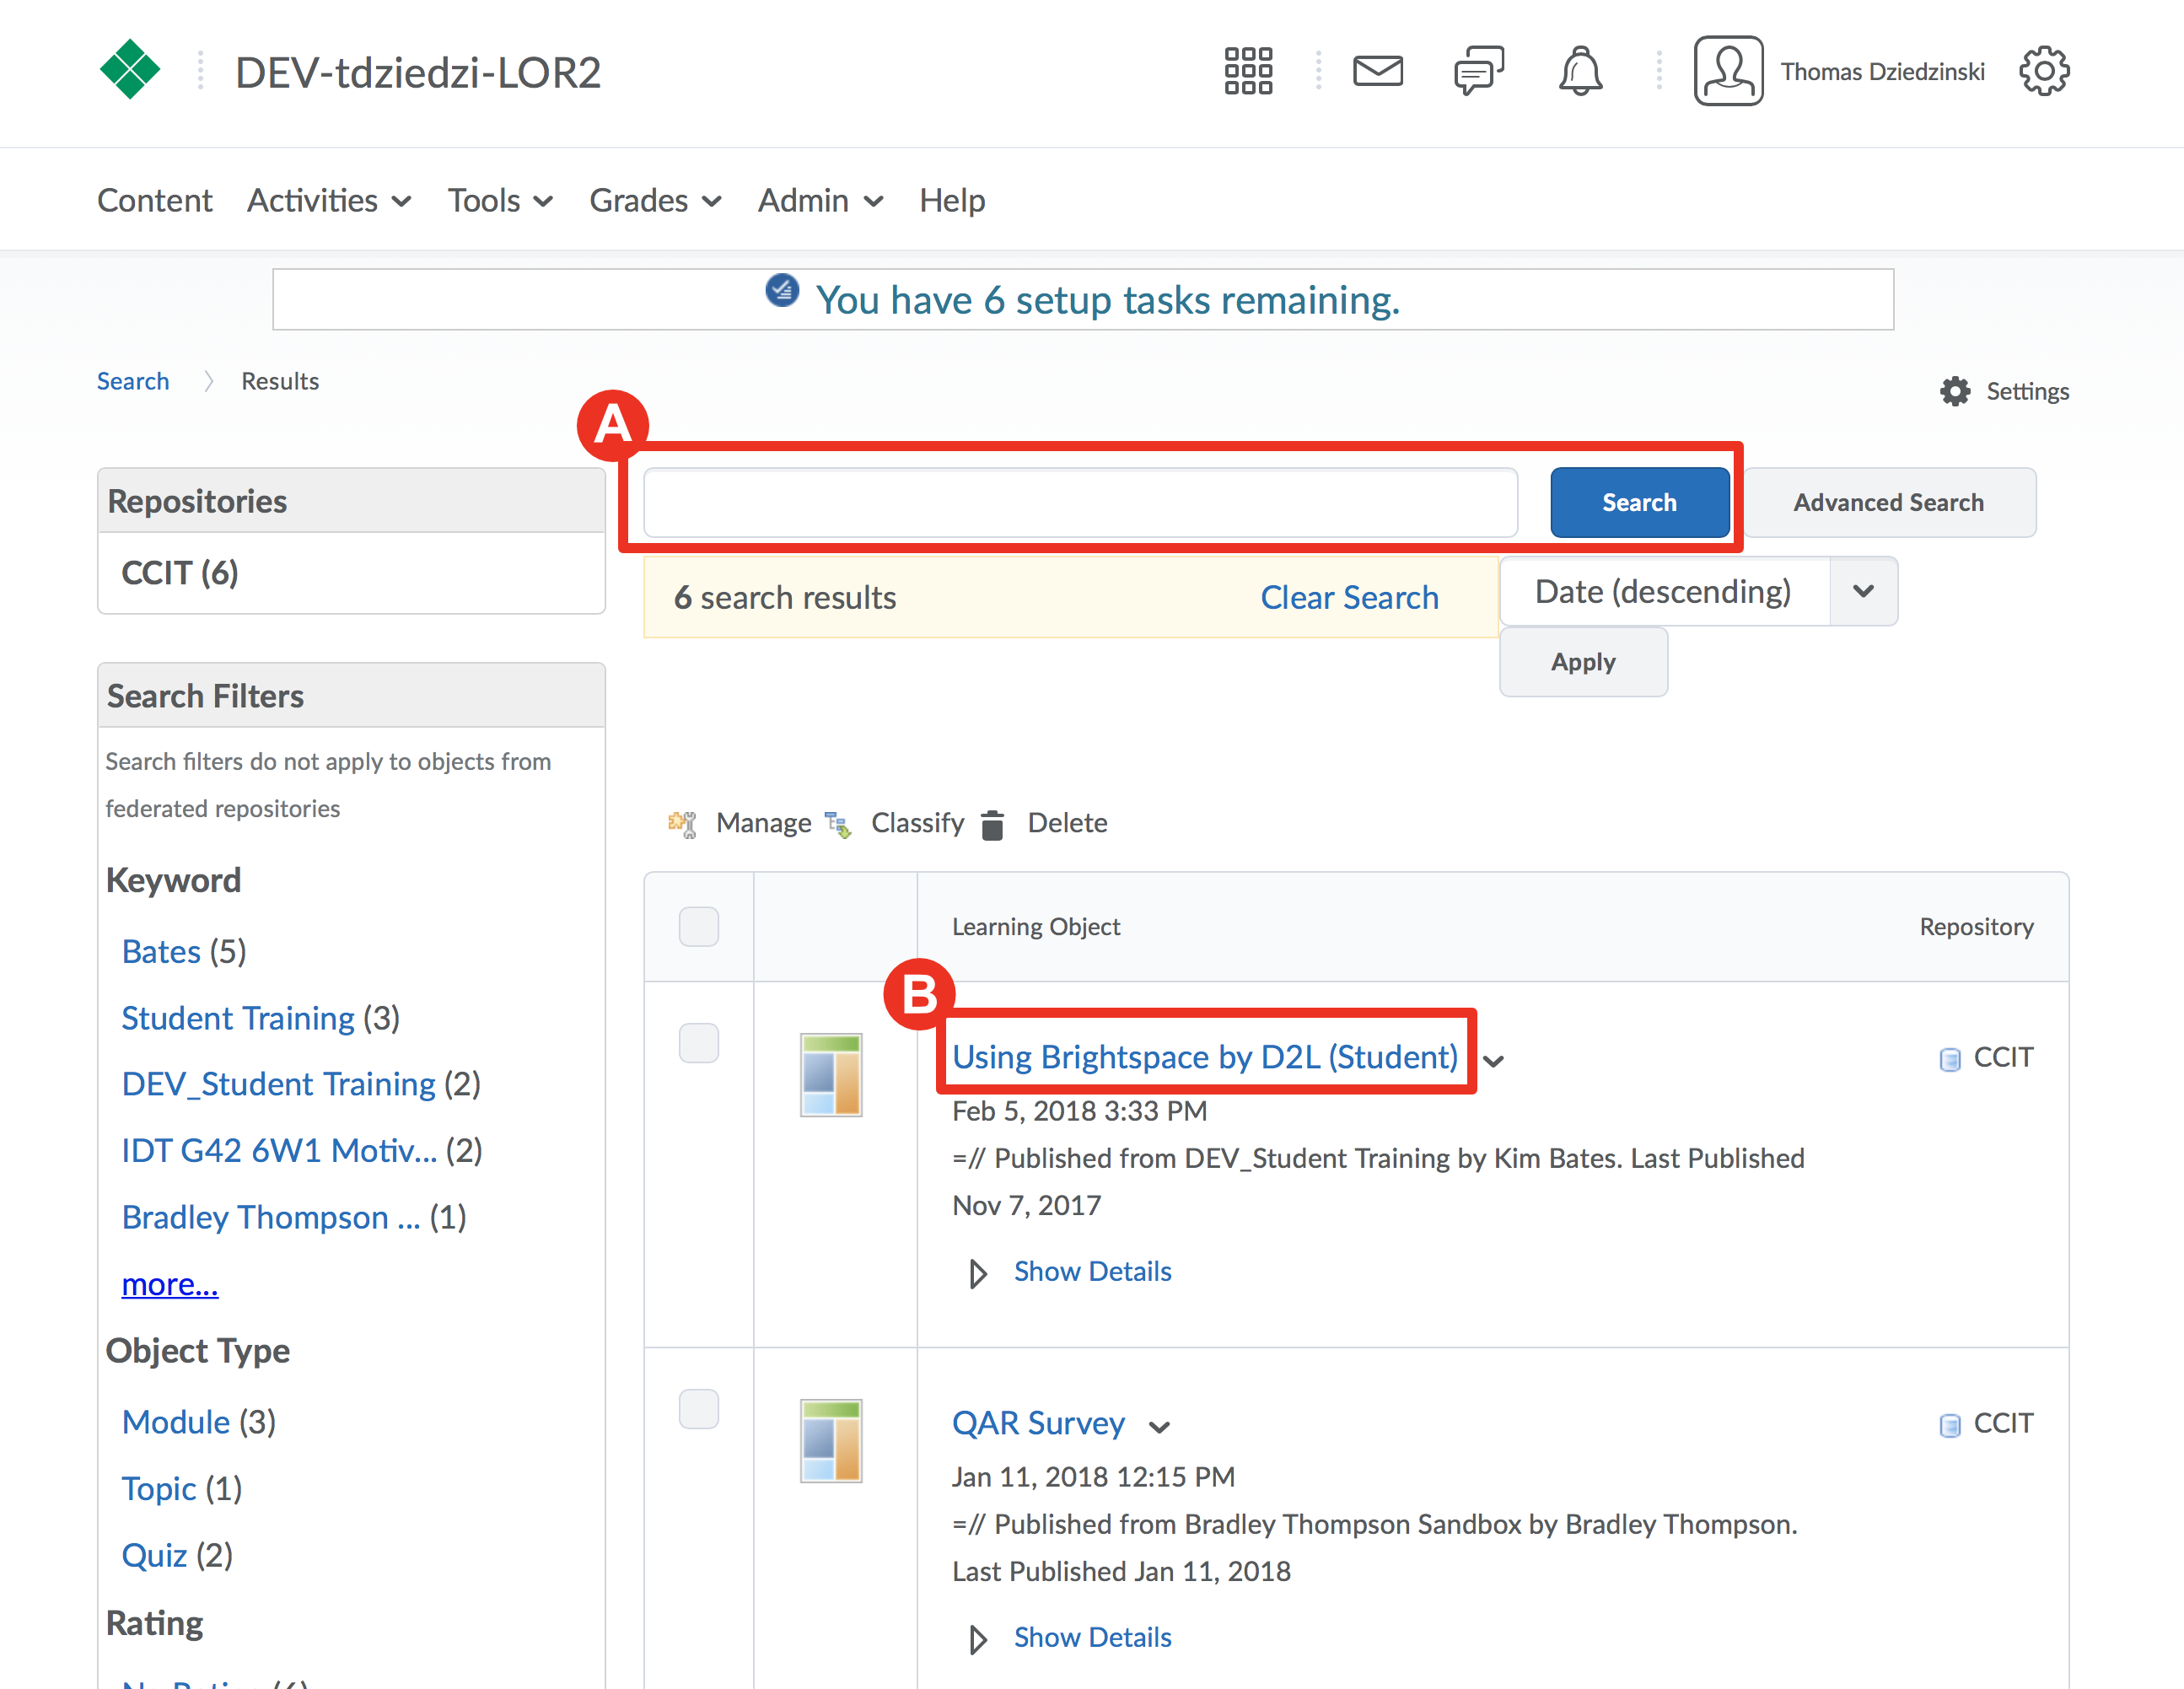
Screenshot of LOR highlighting searching and clicking an object

Step 2

Click on the “More Actions” button
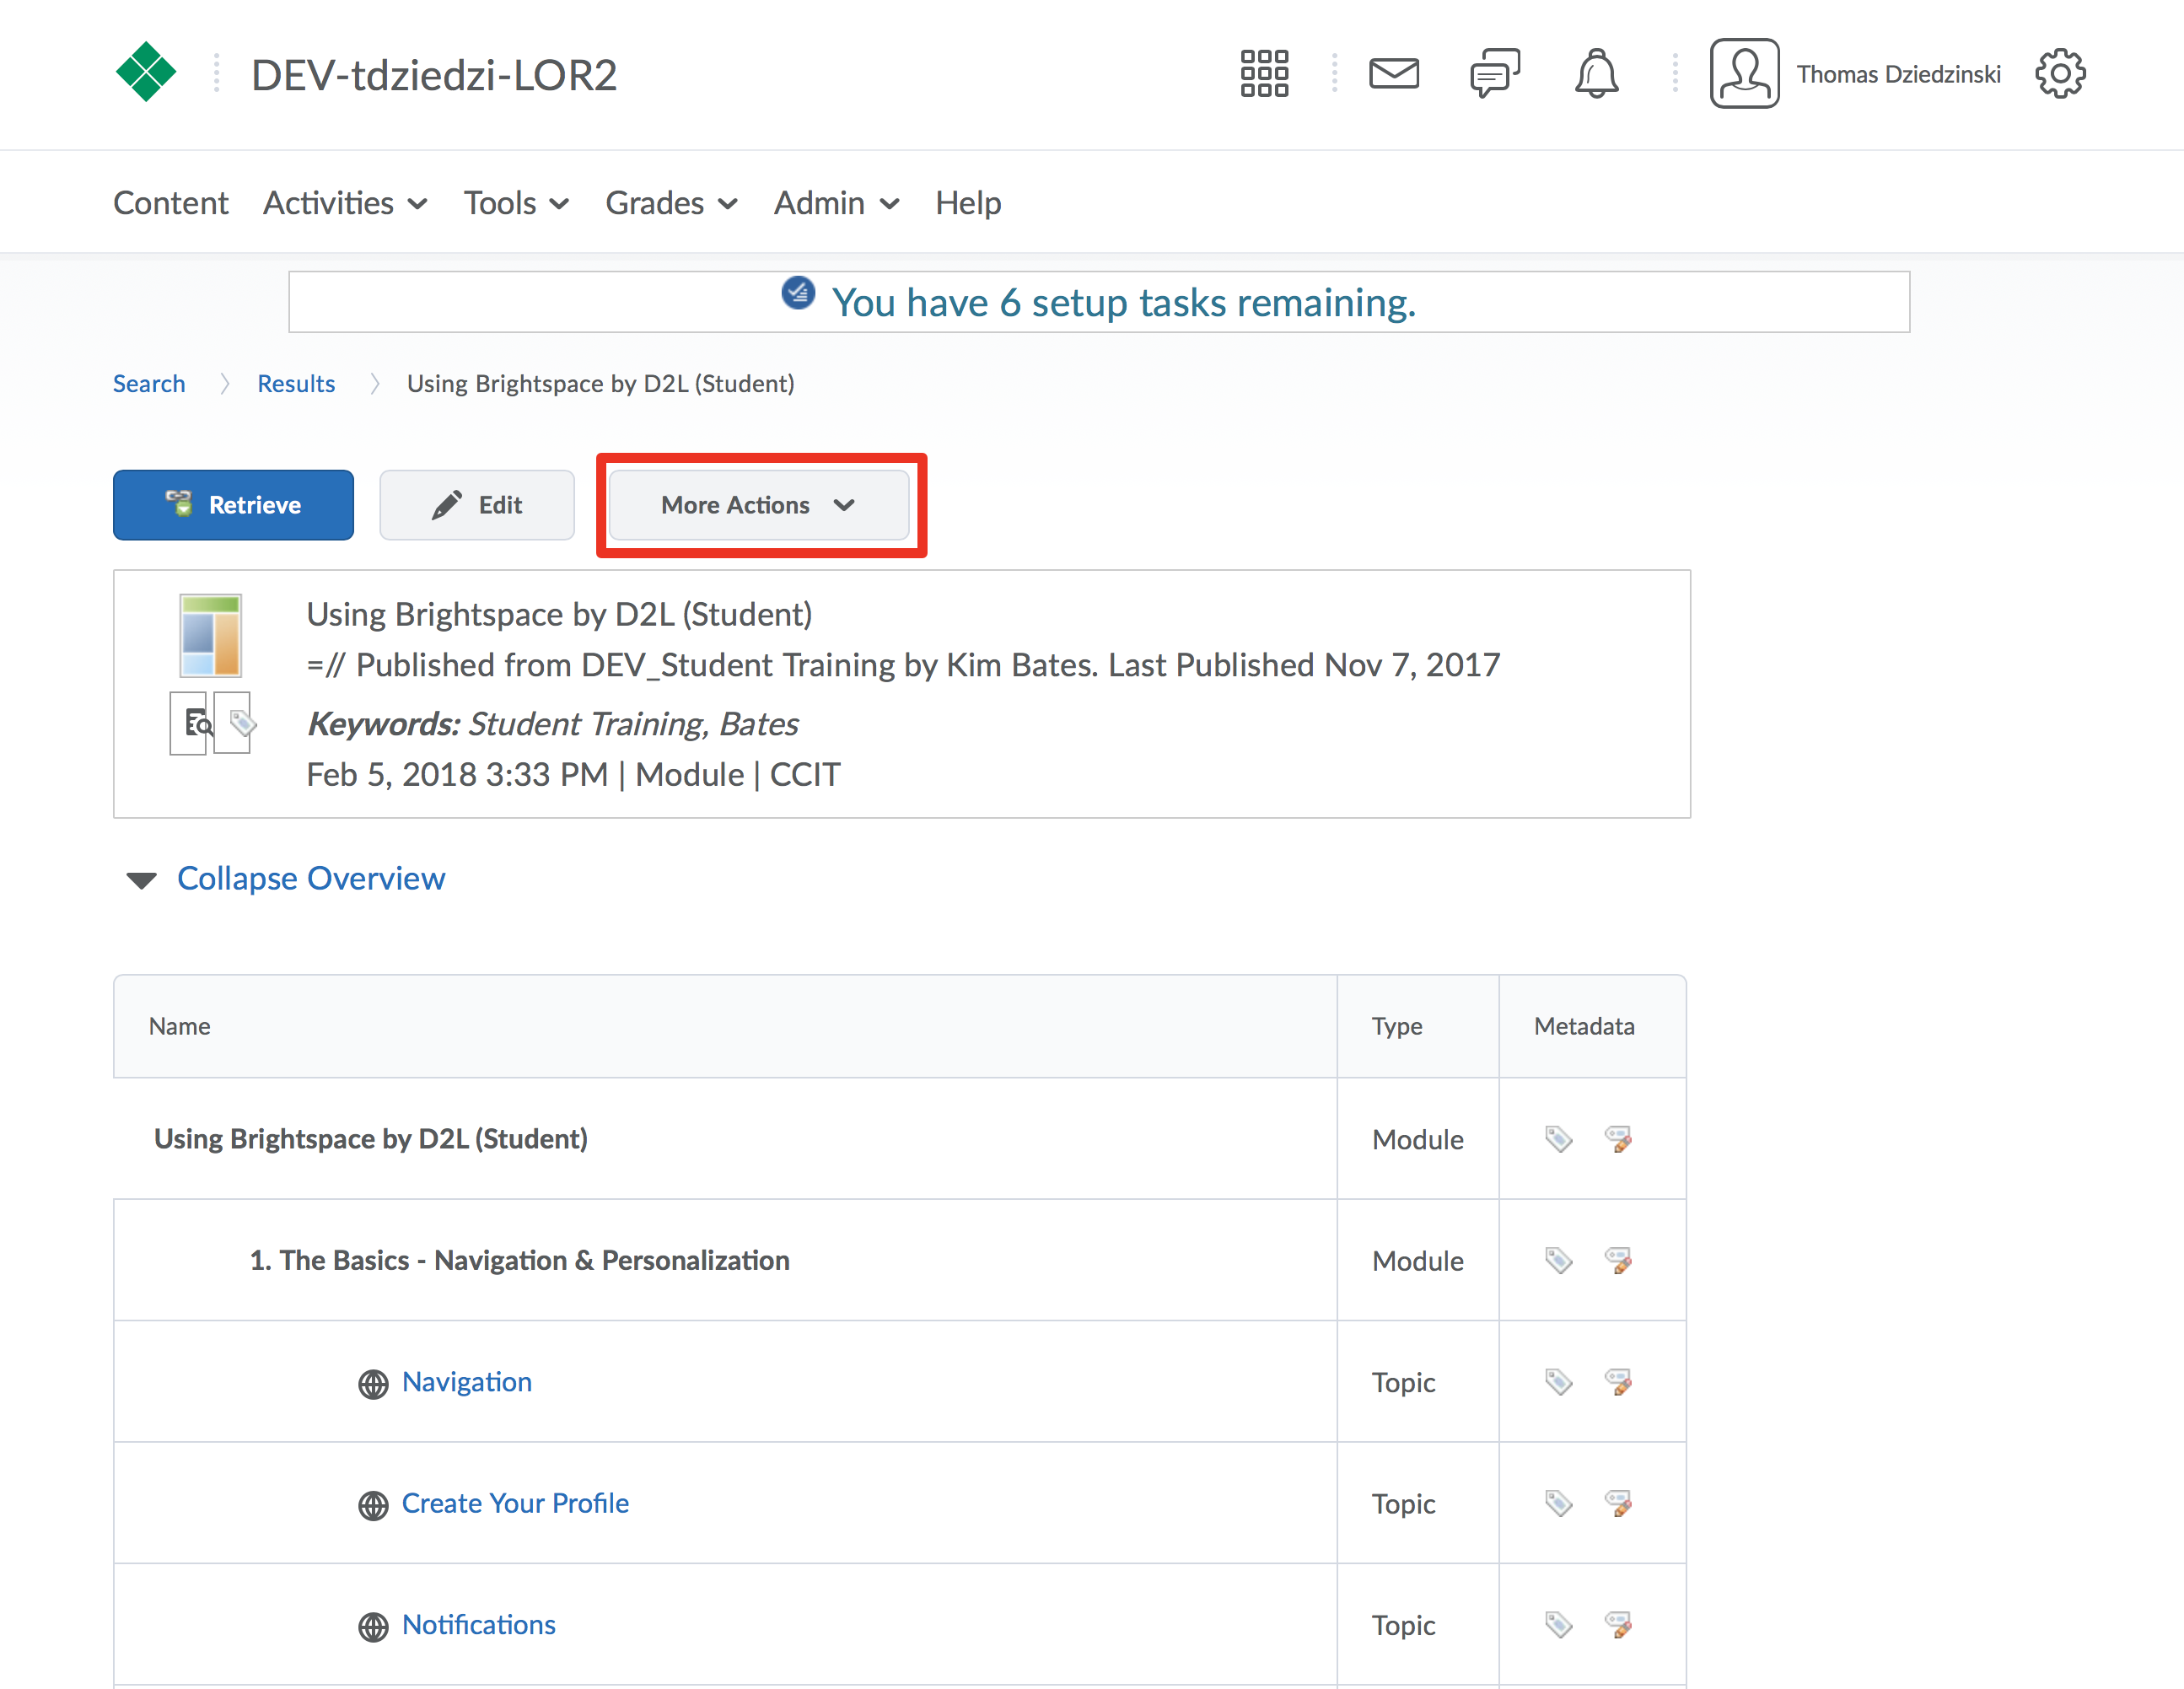
screenshot of learning object detail page, highlighting more actions button

Step 3

Click “Add to Collection”
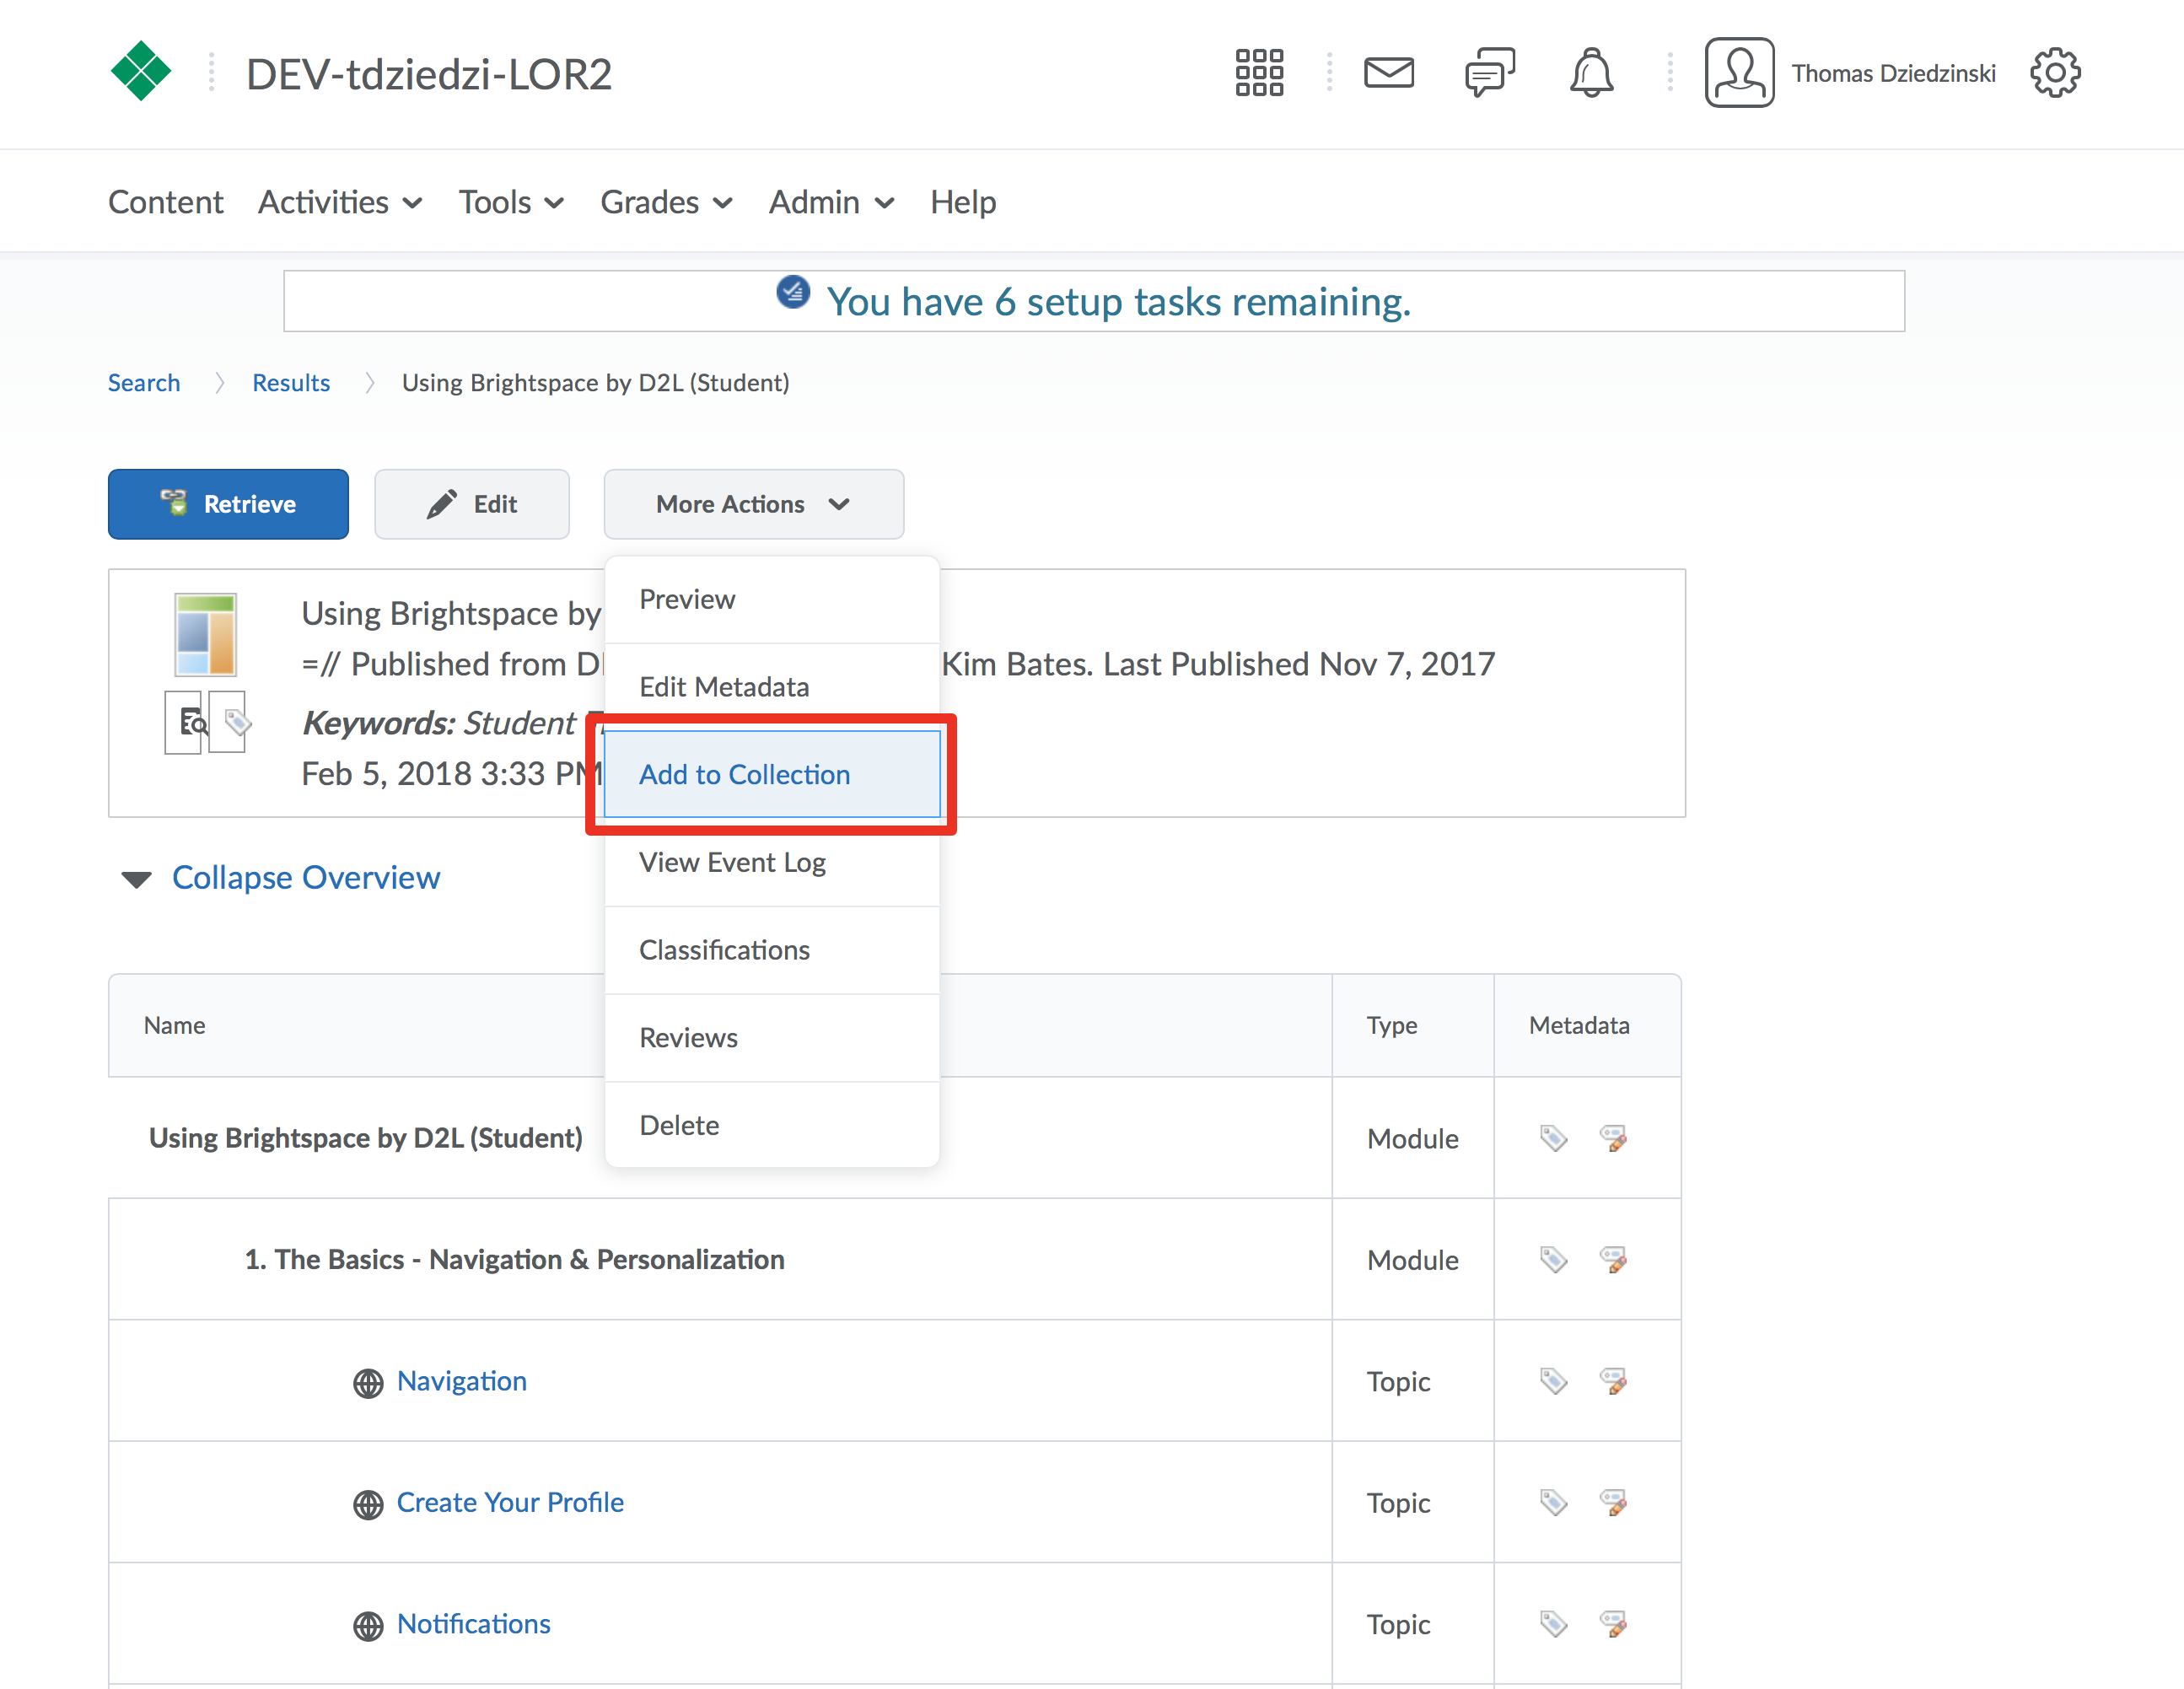
screenshot highlighting add to collection

Step 4

Choose or create a new collection from the drop down menu
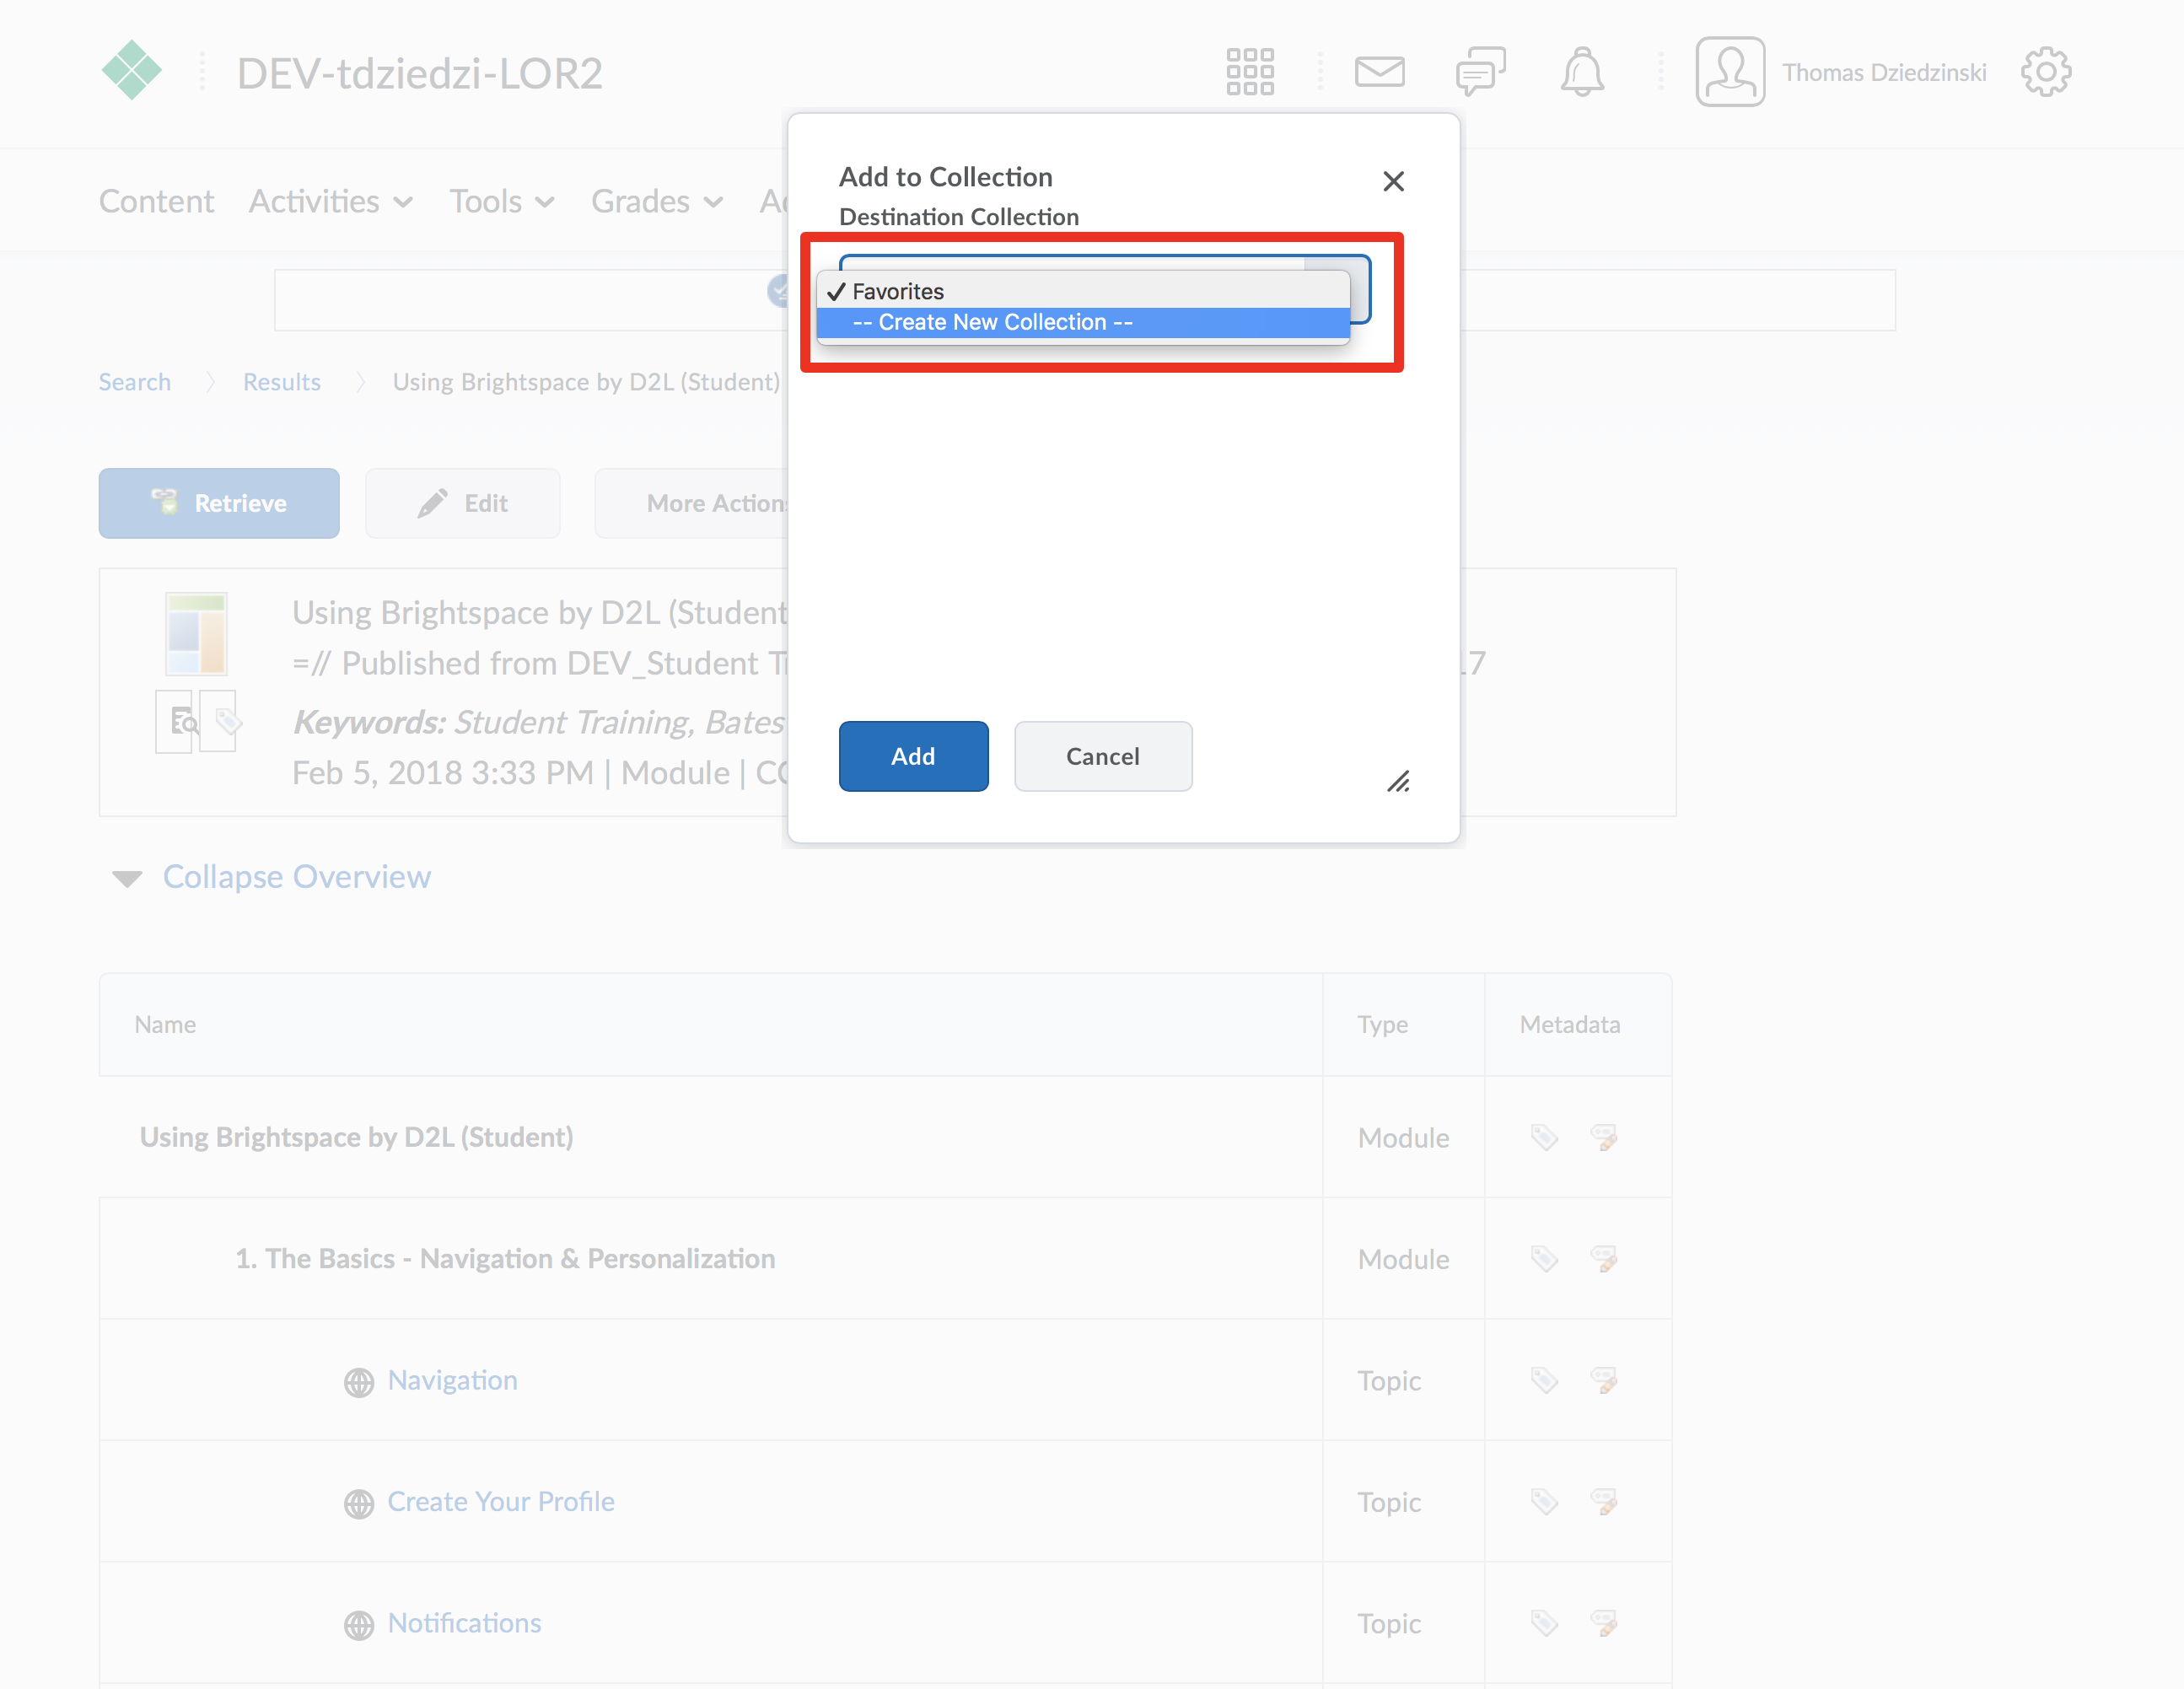
screenshot highlighting choosing or creating a collection

Step 5

Click the “Add” button

screenshot highlighting add button

View a Collection
Step 1

From the Tools menu in the Navbar, click LOR
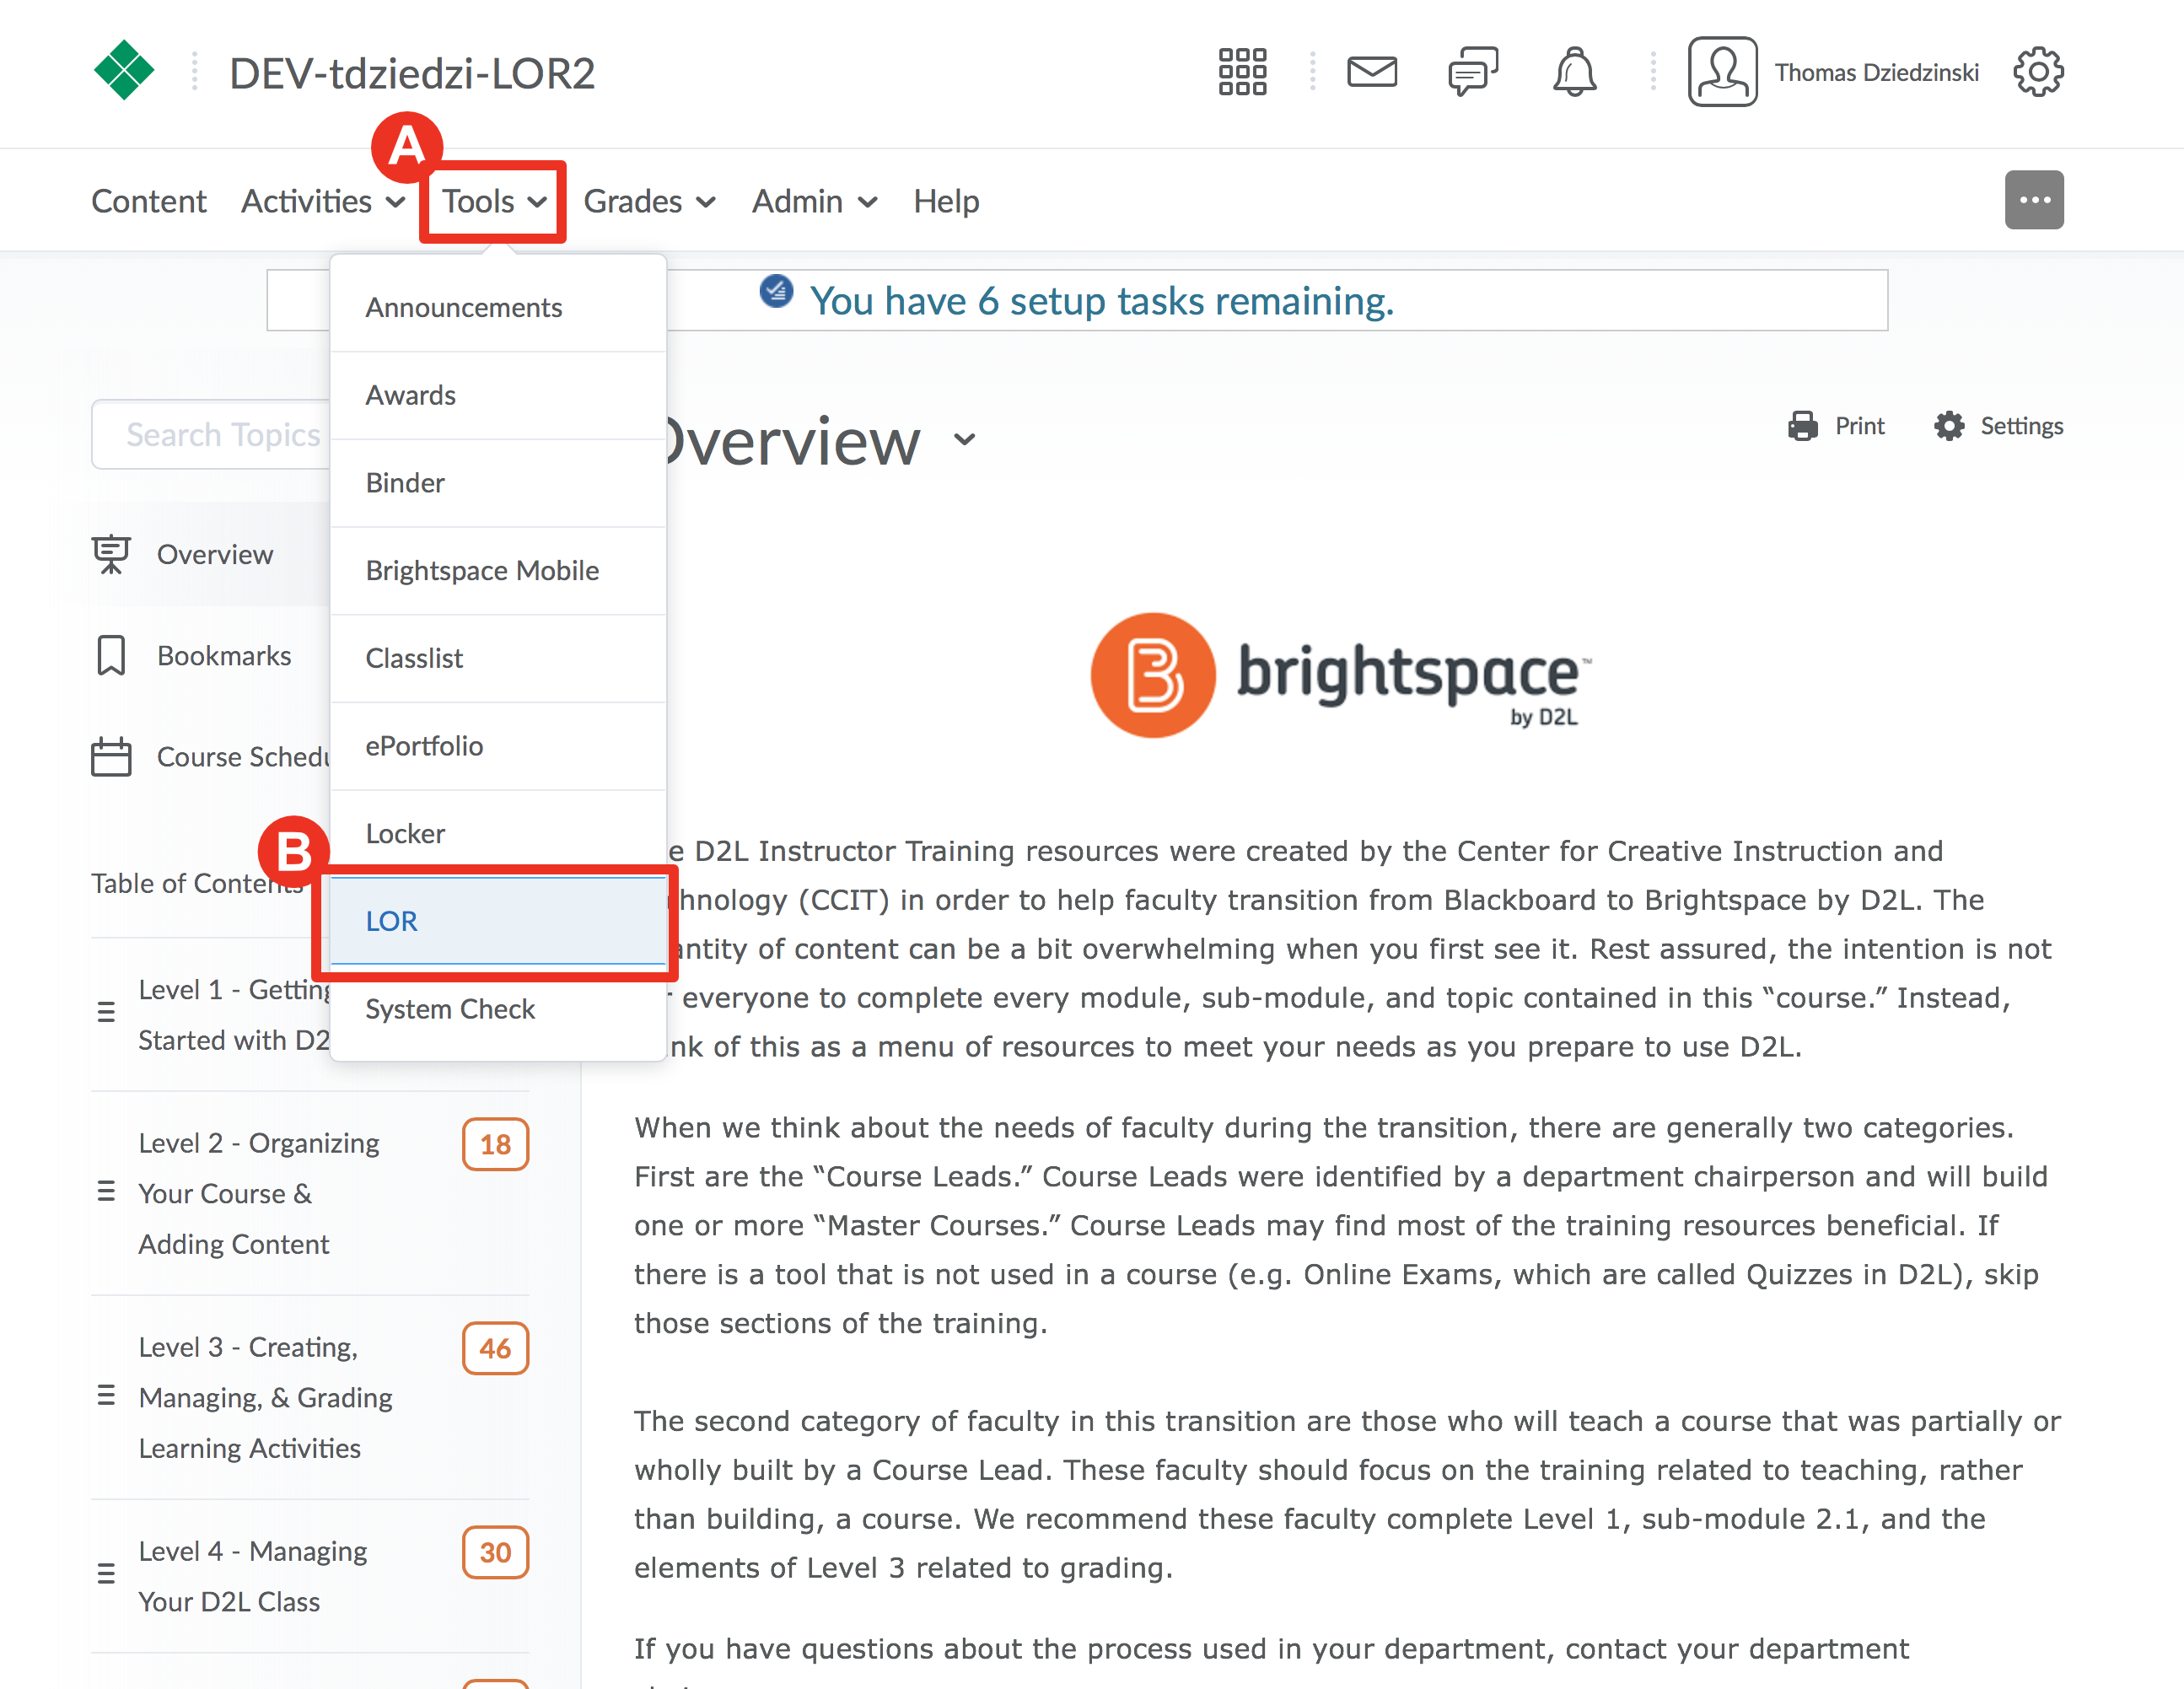
screenshot of Navbar with Tools menu and LOR highlighted

Step 2

On the right side under the heading “My Collections”, click on desired collection
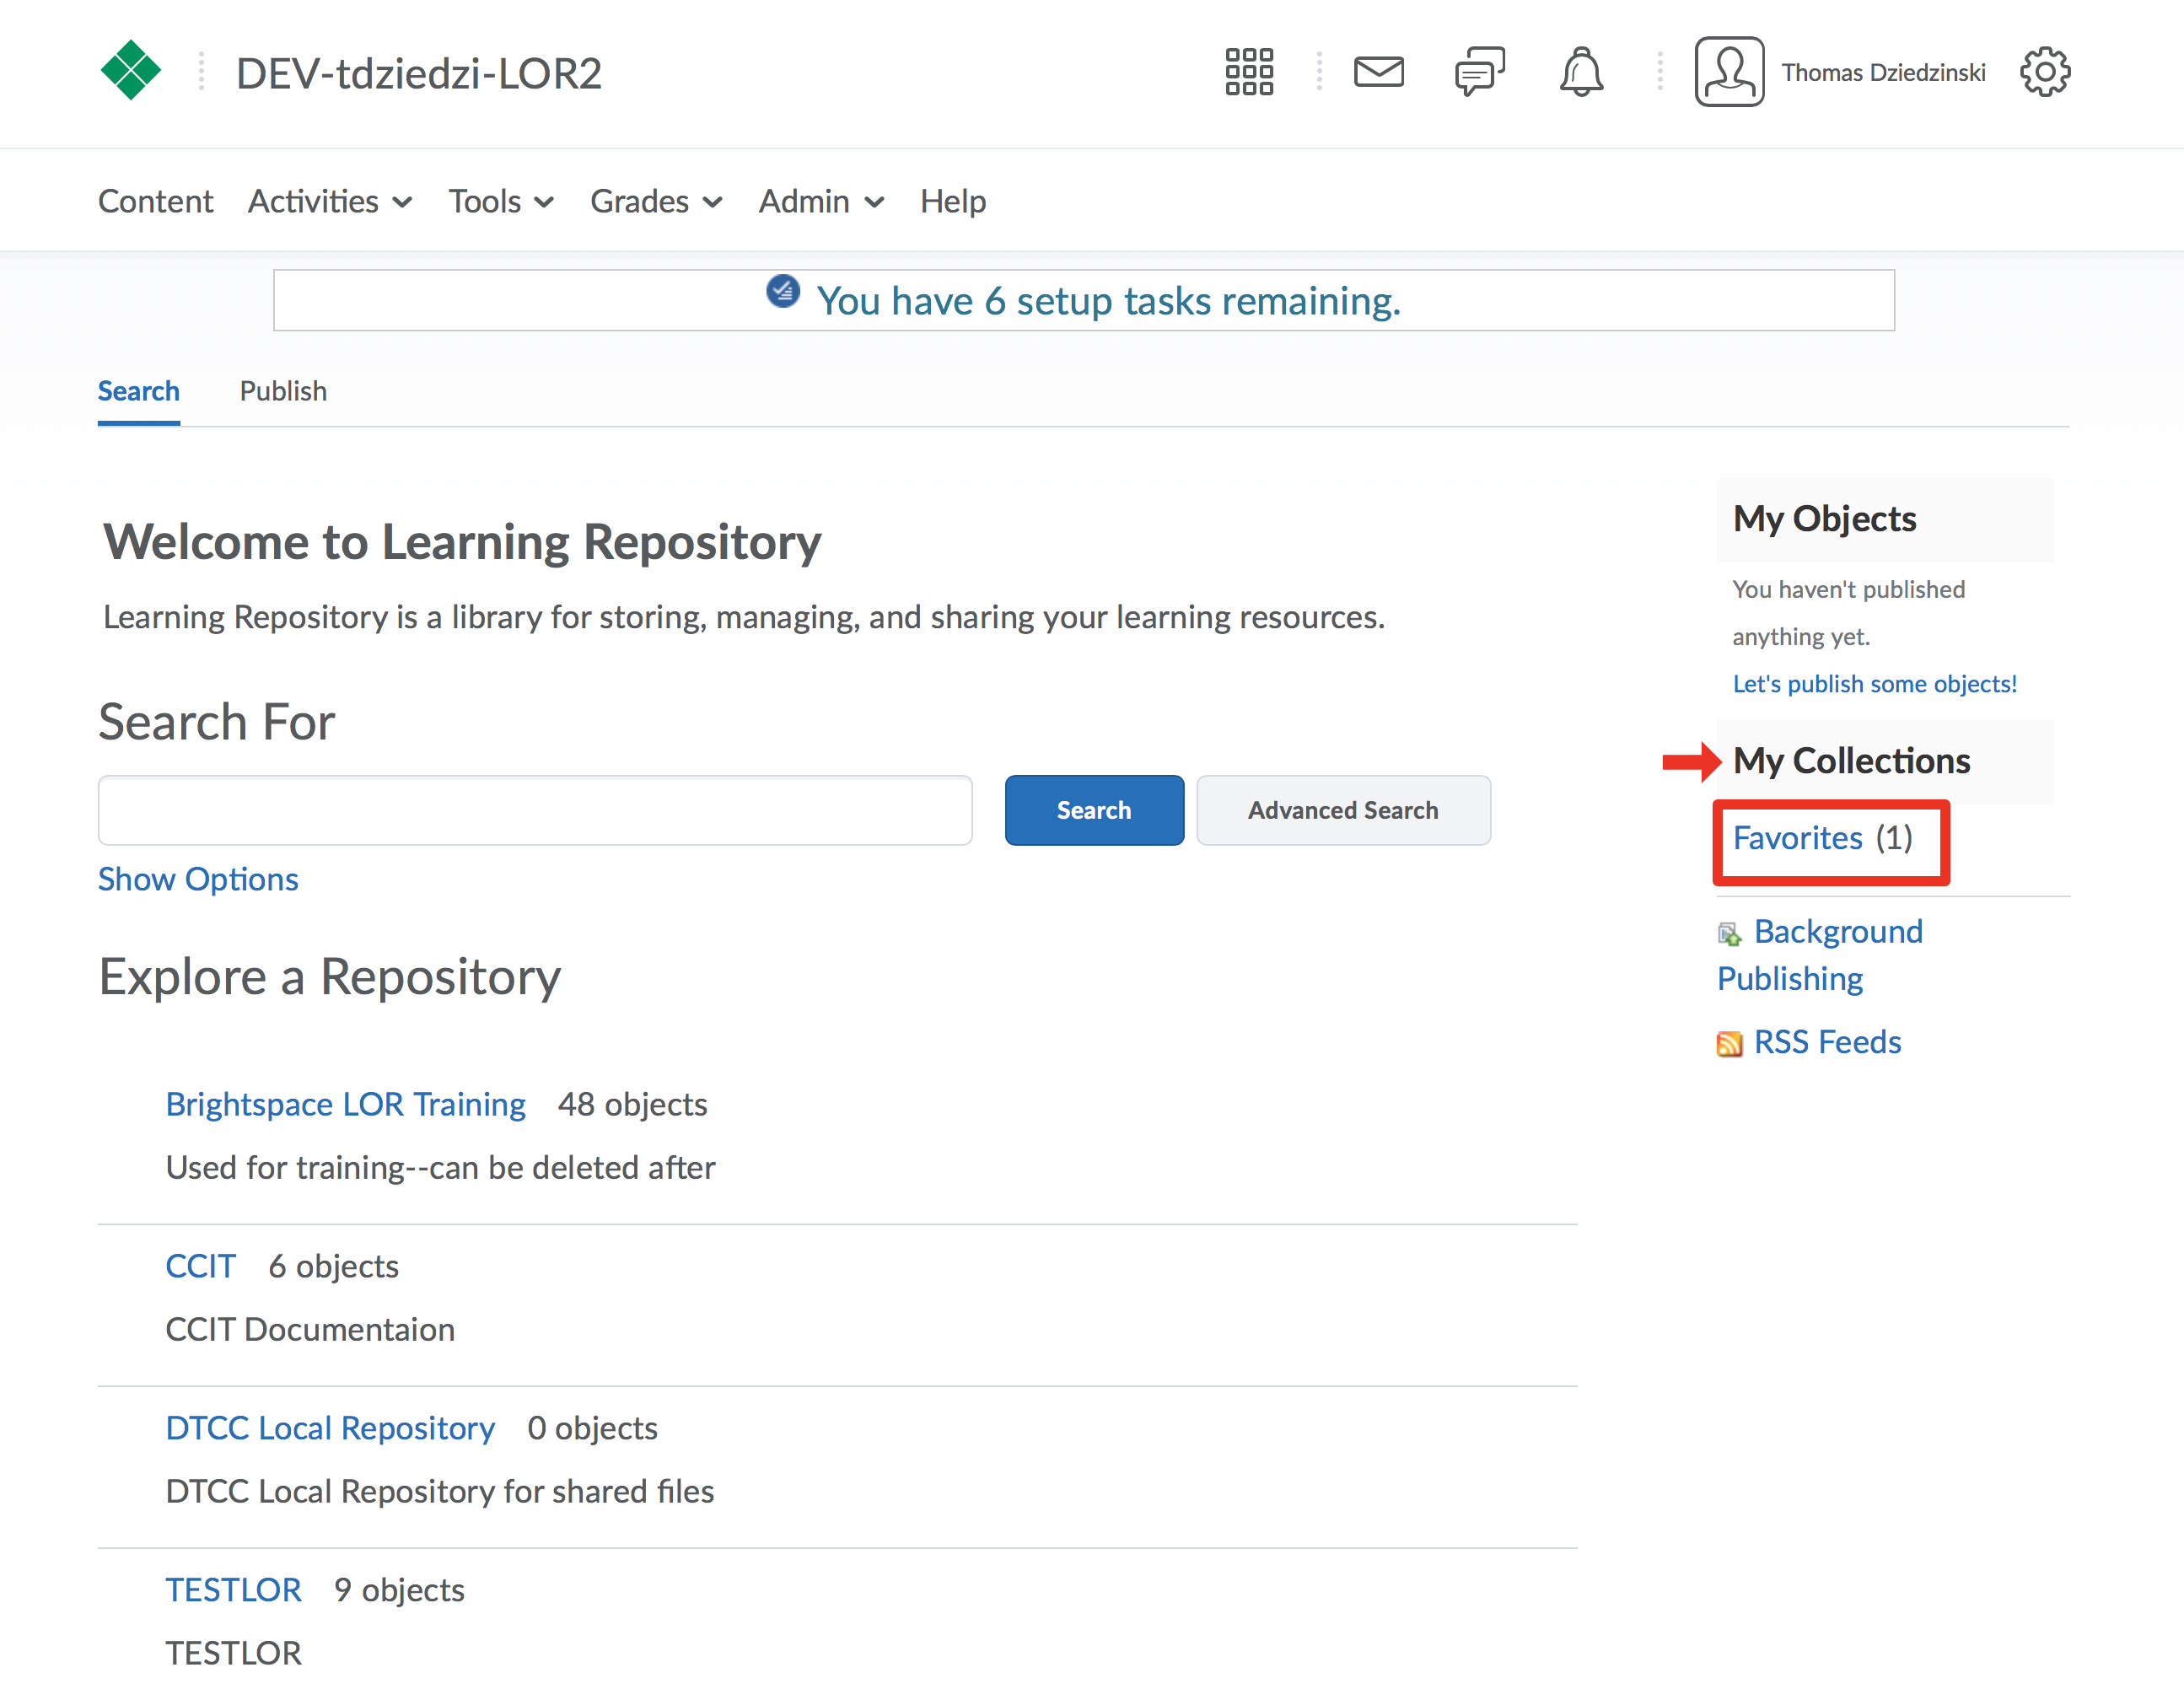
screenshot of LOR homepage highlighting My Collections section on right